

Showing posts with label Cooking. Show all posts
Showing posts with label Cooking. Show all posts
February 9, 2011
Quickie Dinner- Winter Veggie Enchiladas
This time of year, we crave something rich and warm and satisfying for dinner. Make-ahead, freezable and able to go from fridge to oven is a bonus! These versatile and yummy enchiladas fit the bill on all counts and are a thrifty and delicious staple to add to your meal plan!


February 2, 2011
It's Time to Make the Bagels!
Okay, forgive me for this self-indulgent trip down memory lane (those who grew up with Dunkin Donuts know the reference). Last week, we had two snow days, which left me with plenty of time to scheme what I would bring to our weekly brunch that we have with neighbors. I've conquered cinnamon rolls, gone down the fritata and quiche route before and made an amazing banana french toast. Hmmm. I wanted something satisfying. Something really not virtuous at all. I was stumped. Then, I browsed over to Smitten Kitchen. Where all of my good dieting and exercising intentions go straight to hell.
And I saw this. Homemade bagels. Time consuming, but exactly what I wanted to eat. It was on. I had nothing but time.

1 tsp active, dry yeast (from a packet, reserve the other tsp.)
4 c. flour (I used all-purpose, because it was all I had and I wasn't about to go out in a blizzard to get bread flour)
2 1/2 c. warm, not hot water
Mix together the yeast and flour in a large bowl. Add the water and mix well. Our mixture was really thick, although the original recipe says it should be like pancake batter. It still rose well, so don't worry.
Cover with saran wrap and leave to rise for 2 hours. We left ours in the oven, since our kitchen is cold and drafty. Lucky us.
Part Two- Make the Dough:
1 tsp. active, dry yeast (reserved from original package)
3 c. flour
3 tsp. salt
1 tbsp. agave nectar, honey or brown sugar (original recipe calls for malt powder)
The dough should be well-risen (ours was just about doubled). Tap the bowl a few times on the countertop to deflate it. Transfer to the bowl of your stand mixer and fit your mixer with the dough hook. Add 1 tsp. yeast (reserved), 3 c. of flour, salt and malt powder (we used Agave nectar, which worked fine.) Stir until ingredients form a ball. The original recipe calls for an additional 3/4 c. of flour, but we didn't need it. Our dough was super stiff at this point.
Transfer to a floured counter top and knead until dough becomes really smooth and elastic. This takes some muscle so be prepared. We kneaded for about 10 minutes.
Prepare your baking sheets. We used a total of four (4) half-sheet pans. Spray them with non-stick spray (Pam) and then top with a sheet of parchment.
Begin breaking off pieces of dough. It's best if you have a food scale so you can make sure they 're uniform in size and will bake evenly. We made our bagels 2.5 ounces each.
Roll into little balls and cover all of your dough with damp paper towel. Rest for 20 minutes (we again rested in the oven).
Part 3- Form the Bagels:
After 20 minutes or so, take them out and form into your bagel shape. We did this by poking a hole in the middle of each little ball and gently stretching the dough into a 2 1/2-inch ring. Spray your parchment lined baking sheets with a little spray oil and place each bagel about 2 inches apart on the sheets. You want to leave plenty of space around each bagel.

Cover with saran wrap and let the bagels sit for another 20 minutes at room temperature.
Fill a wide bowl with room-temperature water. Take a bagel and plunk it into the water. If it floats, you're ready to refrigerate the bagels. If not, let them continue to sit at room temperature and check back after another 10 minutes. Dry your test bagel off, wrap the sheets really well with plastic wrap and slide into the fridge. You'll leave them there overnight, or for up to two days.
Part 4- Bake the Bagels!
Preheat oven to 400 degrees f. Take your widest pot (we used a cast-iron Dutch oven) and fill it with a few inches of water. Place it over high heat and bring to a boil. Add a tablespoon of baking soda. We also added a tablespoon of agave nectar to give the bagels some color.

When water is boiling, add in a few bagels- they shouldn't be crowded into the pot. While the bagels are boiling, spread out some cornmeal on your baking sheets. After two minutes, flip each bagel and boil for an additional two minutes (We use a chopstick for easy flipping!). Remove the bagels back to the cornmeal lined baking sheet (if you want to top with anything, now is the time!) and place into the oven.

You'll need to do this in batches, but it's easier to just have a system where you can boil, bake, rotate and remove.

Bake for 5 minutes, then rotate your pan and bake for 5 minutes more. Bagels should be browned on top. Remove from pan onto a cooling rack or large platter.

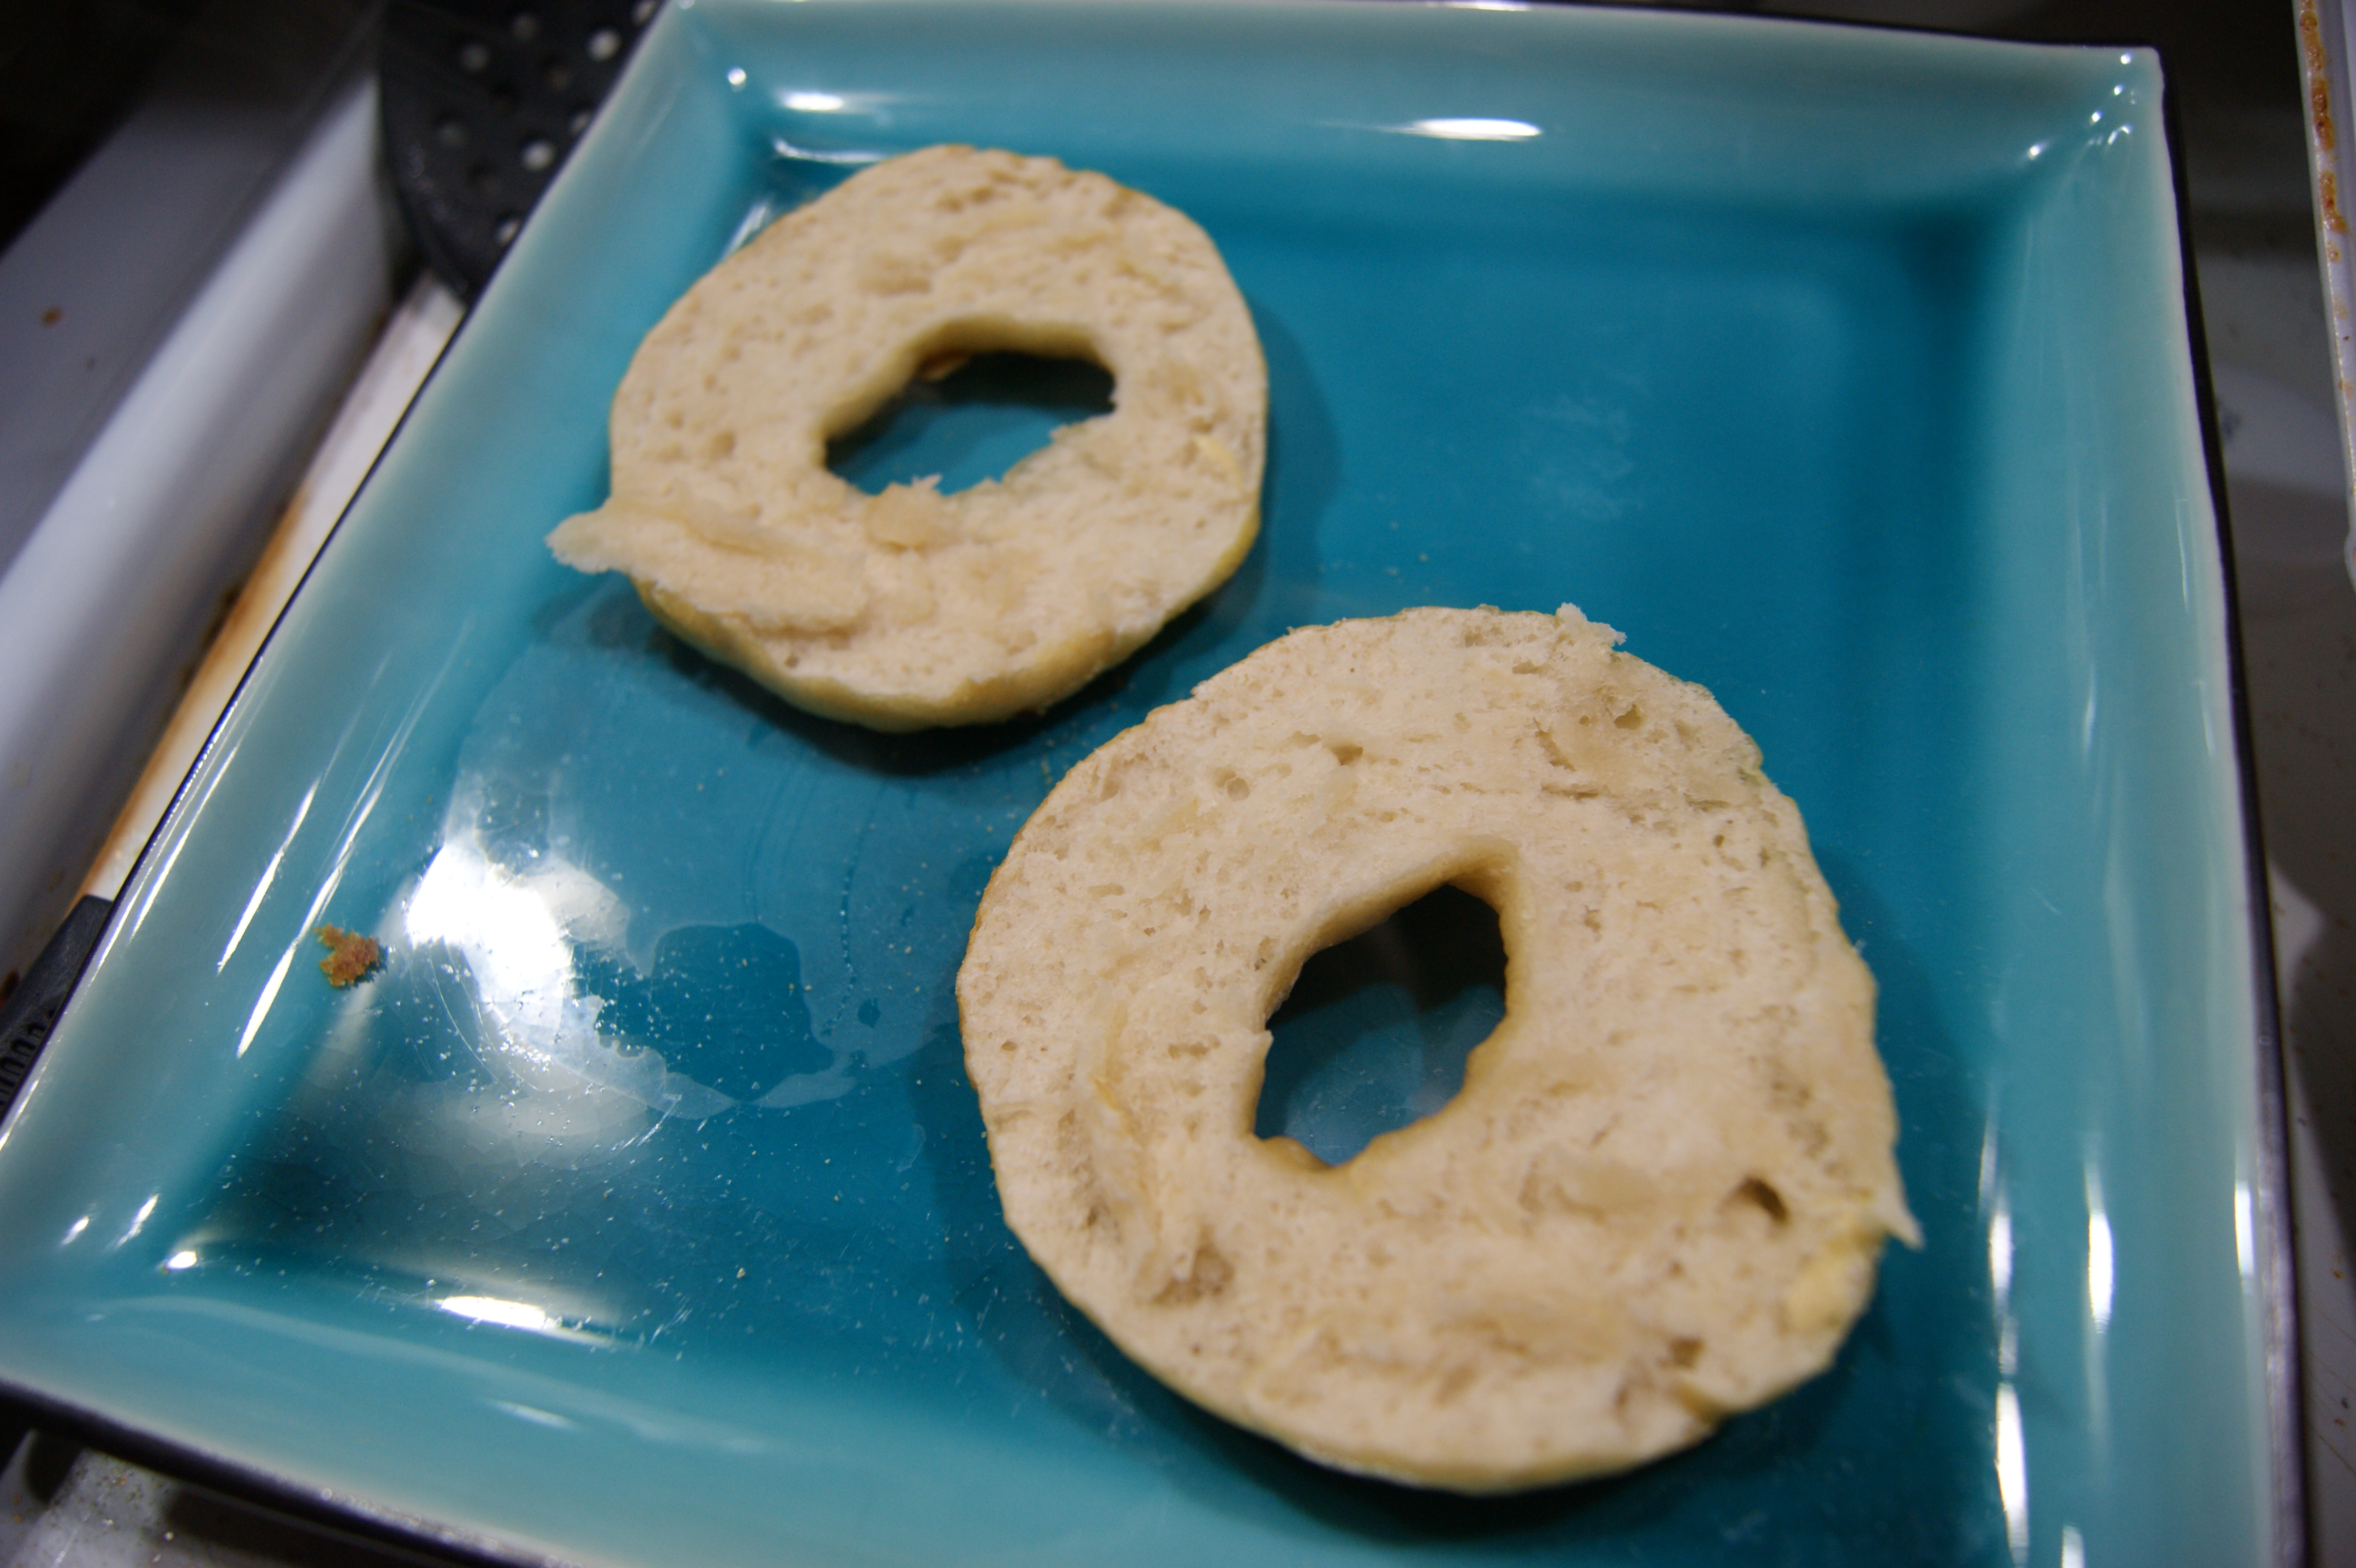
Et voila! Bagels, from your very own kitchen. They were chewy, bready and delicous. Exactly what the doctor ordered on a snowy, icky New England weekend. Oh and they cost about $2 to make two dozen bagels. Score one for the Tiny Wallet!!!!!

And I saw this. Homemade bagels. Time consuming, but exactly what I wanted to eat. It was on. I had nothing but time.
Homemade Bagels
Part 1- Make the Sponge:
1 tsp active, dry yeast (from a packet, reserve the other tsp.)
4 c. flour (I used all-purpose, because it was all I had and I wasn't about to go out in a blizzard to get bread flour)
2 1/2 c. warm, not hot water
Mix together the yeast and flour in a large bowl. Add the water and mix well. Our mixture was really thick, although the original recipe says it should be like pancake batter. It still rose well, so don't worry.
Cover with saran wrap and leave to rise for 2 hours. We left ours in the oven, since our kitchen is cold and drafty. Lucky us.
Part Two- Make the Dough:
1 tsp. active, dry yeast (reserved from original package)
3 c. flour
3 tsp. salt
1 tbsp. agave nectar, honey or brown sugar (original recipe calls for malt powder)
The dough should be well-risen (ours was just about doubled). Tap the bowl a few times on the countertop to deflate it. Transfer to the bowl of your stand mixer and fit your mixer with the dough hook. Add 1 tsp. yeast (reserved), 3 c. of flour, salt and malt powder (we used Agave nectar, which worked fine.) Stir until ingredients form a ball. The original recipe calls for an additional 3/4 c. of flour, but we didn't need it. Our dough was super stiff at this point.
Transfer to a floured counter top and knead until dough becomes really smooth and elastic. This takes some muscle so be prepared. We kneaded for about 10 minutes.
Prepare your baking sheets. We used a total of four (4) half-sheet pans. Spray them with non-stick spray (Pam) and then top with a sheet of parchment.
Begin breaking off pieces of dough. It's best if you have a food scale so you can make sure they 're uniform in size and will bake evenly. We made our bagels 2.5 ounces each.
Roll into little balls and cover all of your dough with damp paper towel. Rest for 20 minutes (we again rested in the oven).
Part 3- Form the Bagels:
After 20 minutes or so, take them out and form into your bagel shape. We did this by poking a hole in the middle of each little ball and gently stretching the dough into a 2 1/2-inch ring. Spray your parchment lined baking sheets with a little spray oil and place each bagel about 2 inches apart on the sheets. You want to leave plenty of space around each bagel.
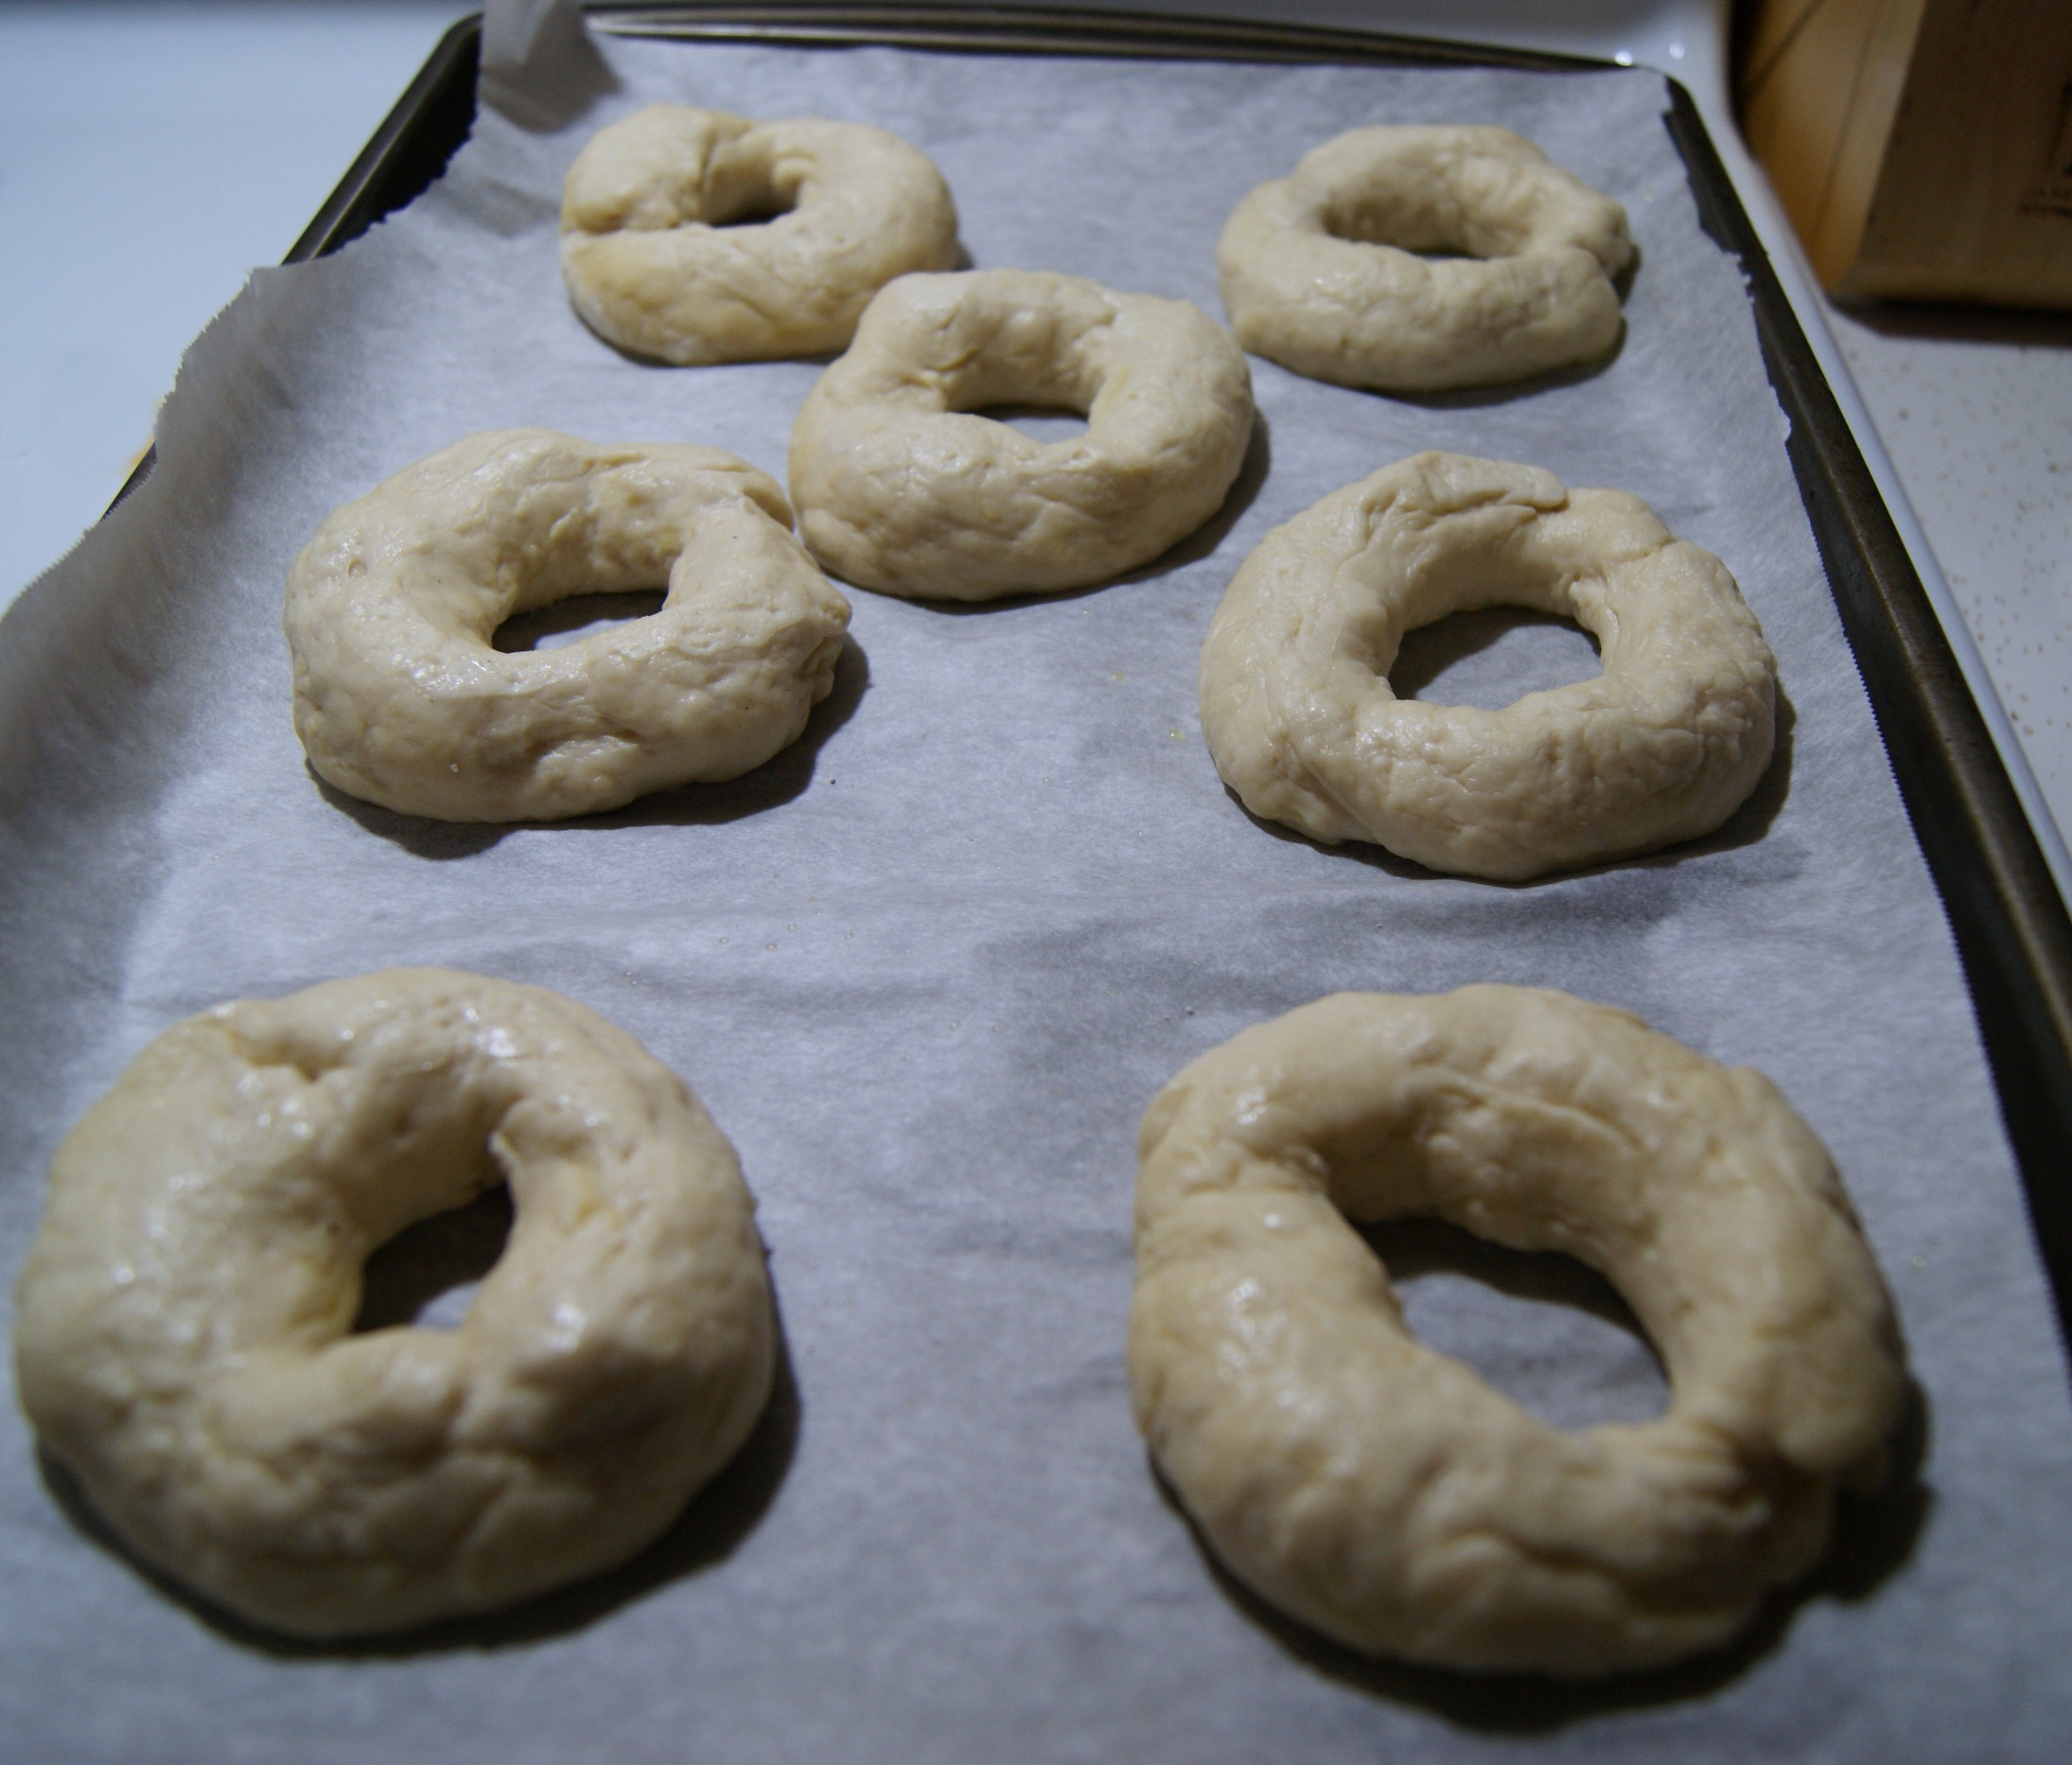
Cover with saran wrap and let the bagels sit for another 20 minutes at room temperature.
Fill a wide bowl with room-temperature water. Take a bagel and plunk it into the water. If it floats, you're ready to refrigerate the bagels. If not, let them continue to sit at room temperature and check back after another 10 minutes. Dry your test bagel off, wrap the sheets really well with plastic wrap and slide into the fridge. You'll leave them there overnight, or for up to two days.
Part 4- Bake the Bagels!
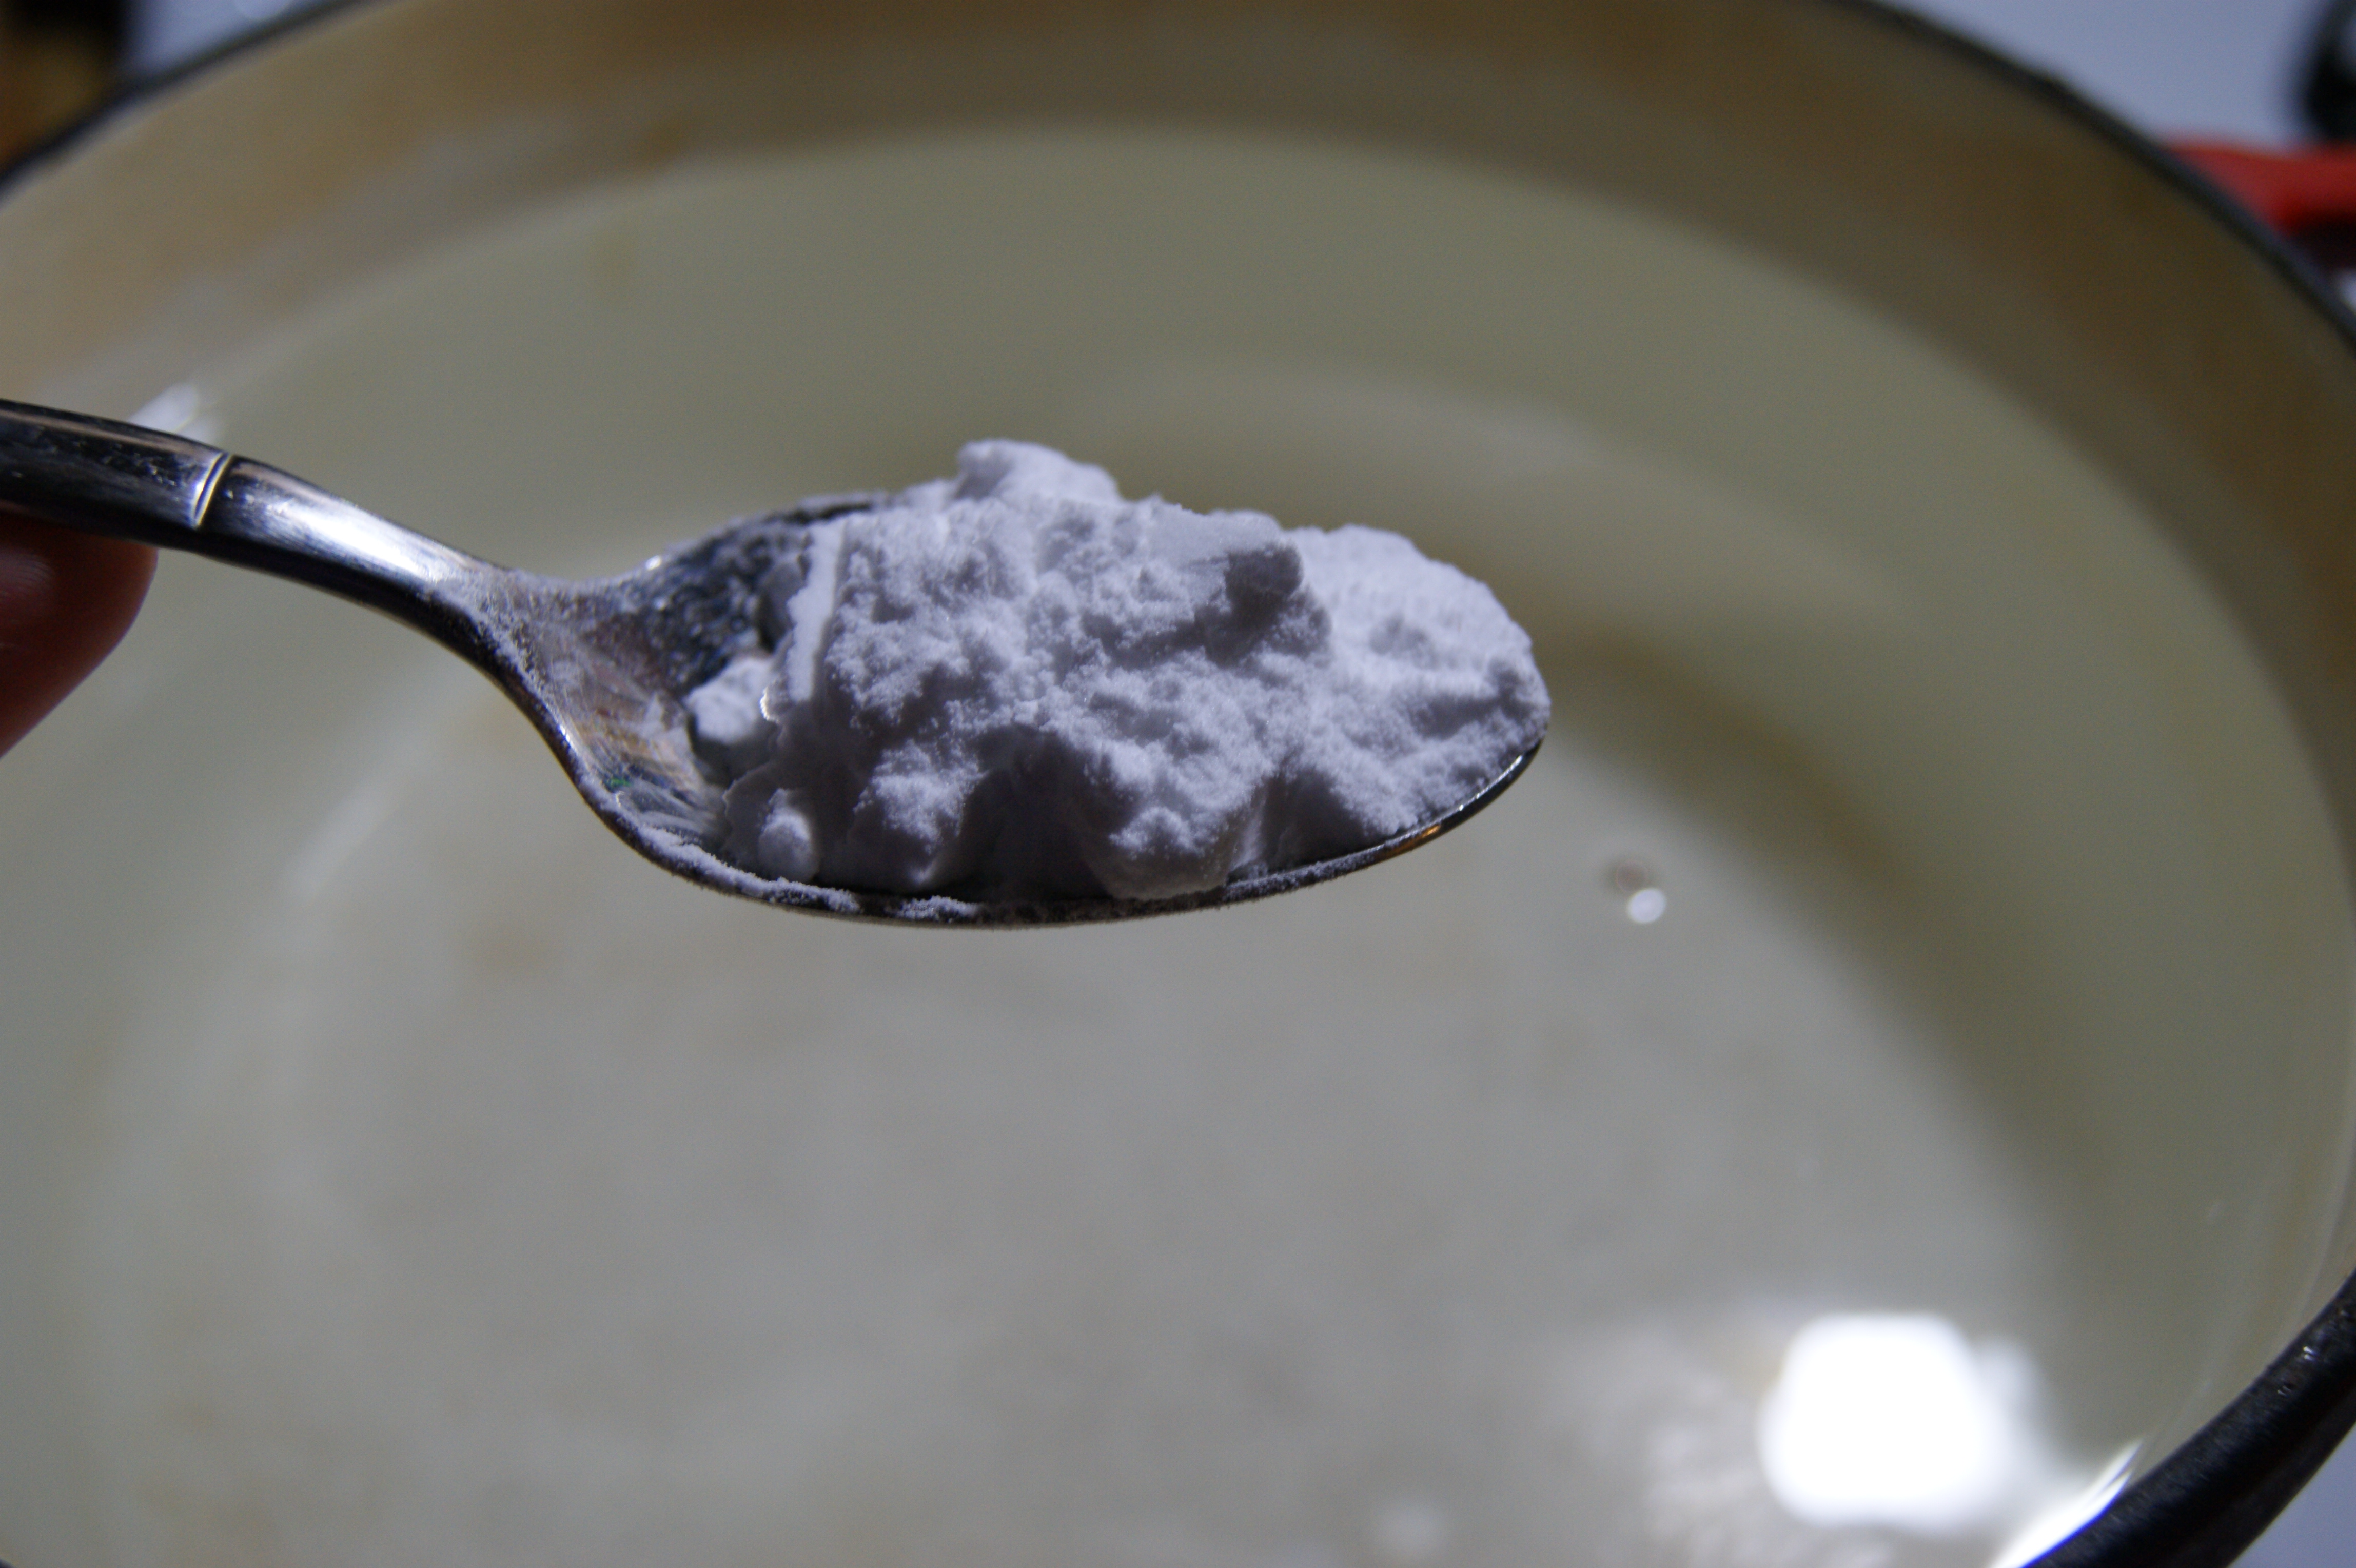
Preheat oven to 400 degrees f. Take your widest pot (we used a cast-iron Dutch oven) and fill it with a few inches of water. Place it over high heat and bring to a boil. Add a tablespoon of baking soda. We also added a tablespoon of agave nectar to give the bagels some color.
When water is boiling, add in a few bagels- they shouldn't be crowded into the pot. While the bagels are boiling, spread out some cornmeal on your baking sheets. After two minutes, flip each bagel and boil for an additional two minutes (We use a chopstick for easy flipping!). Remove the bagels back to the cornmeal lined baking sheet (if you want to top with anything, now is the time!) and place into the oven.
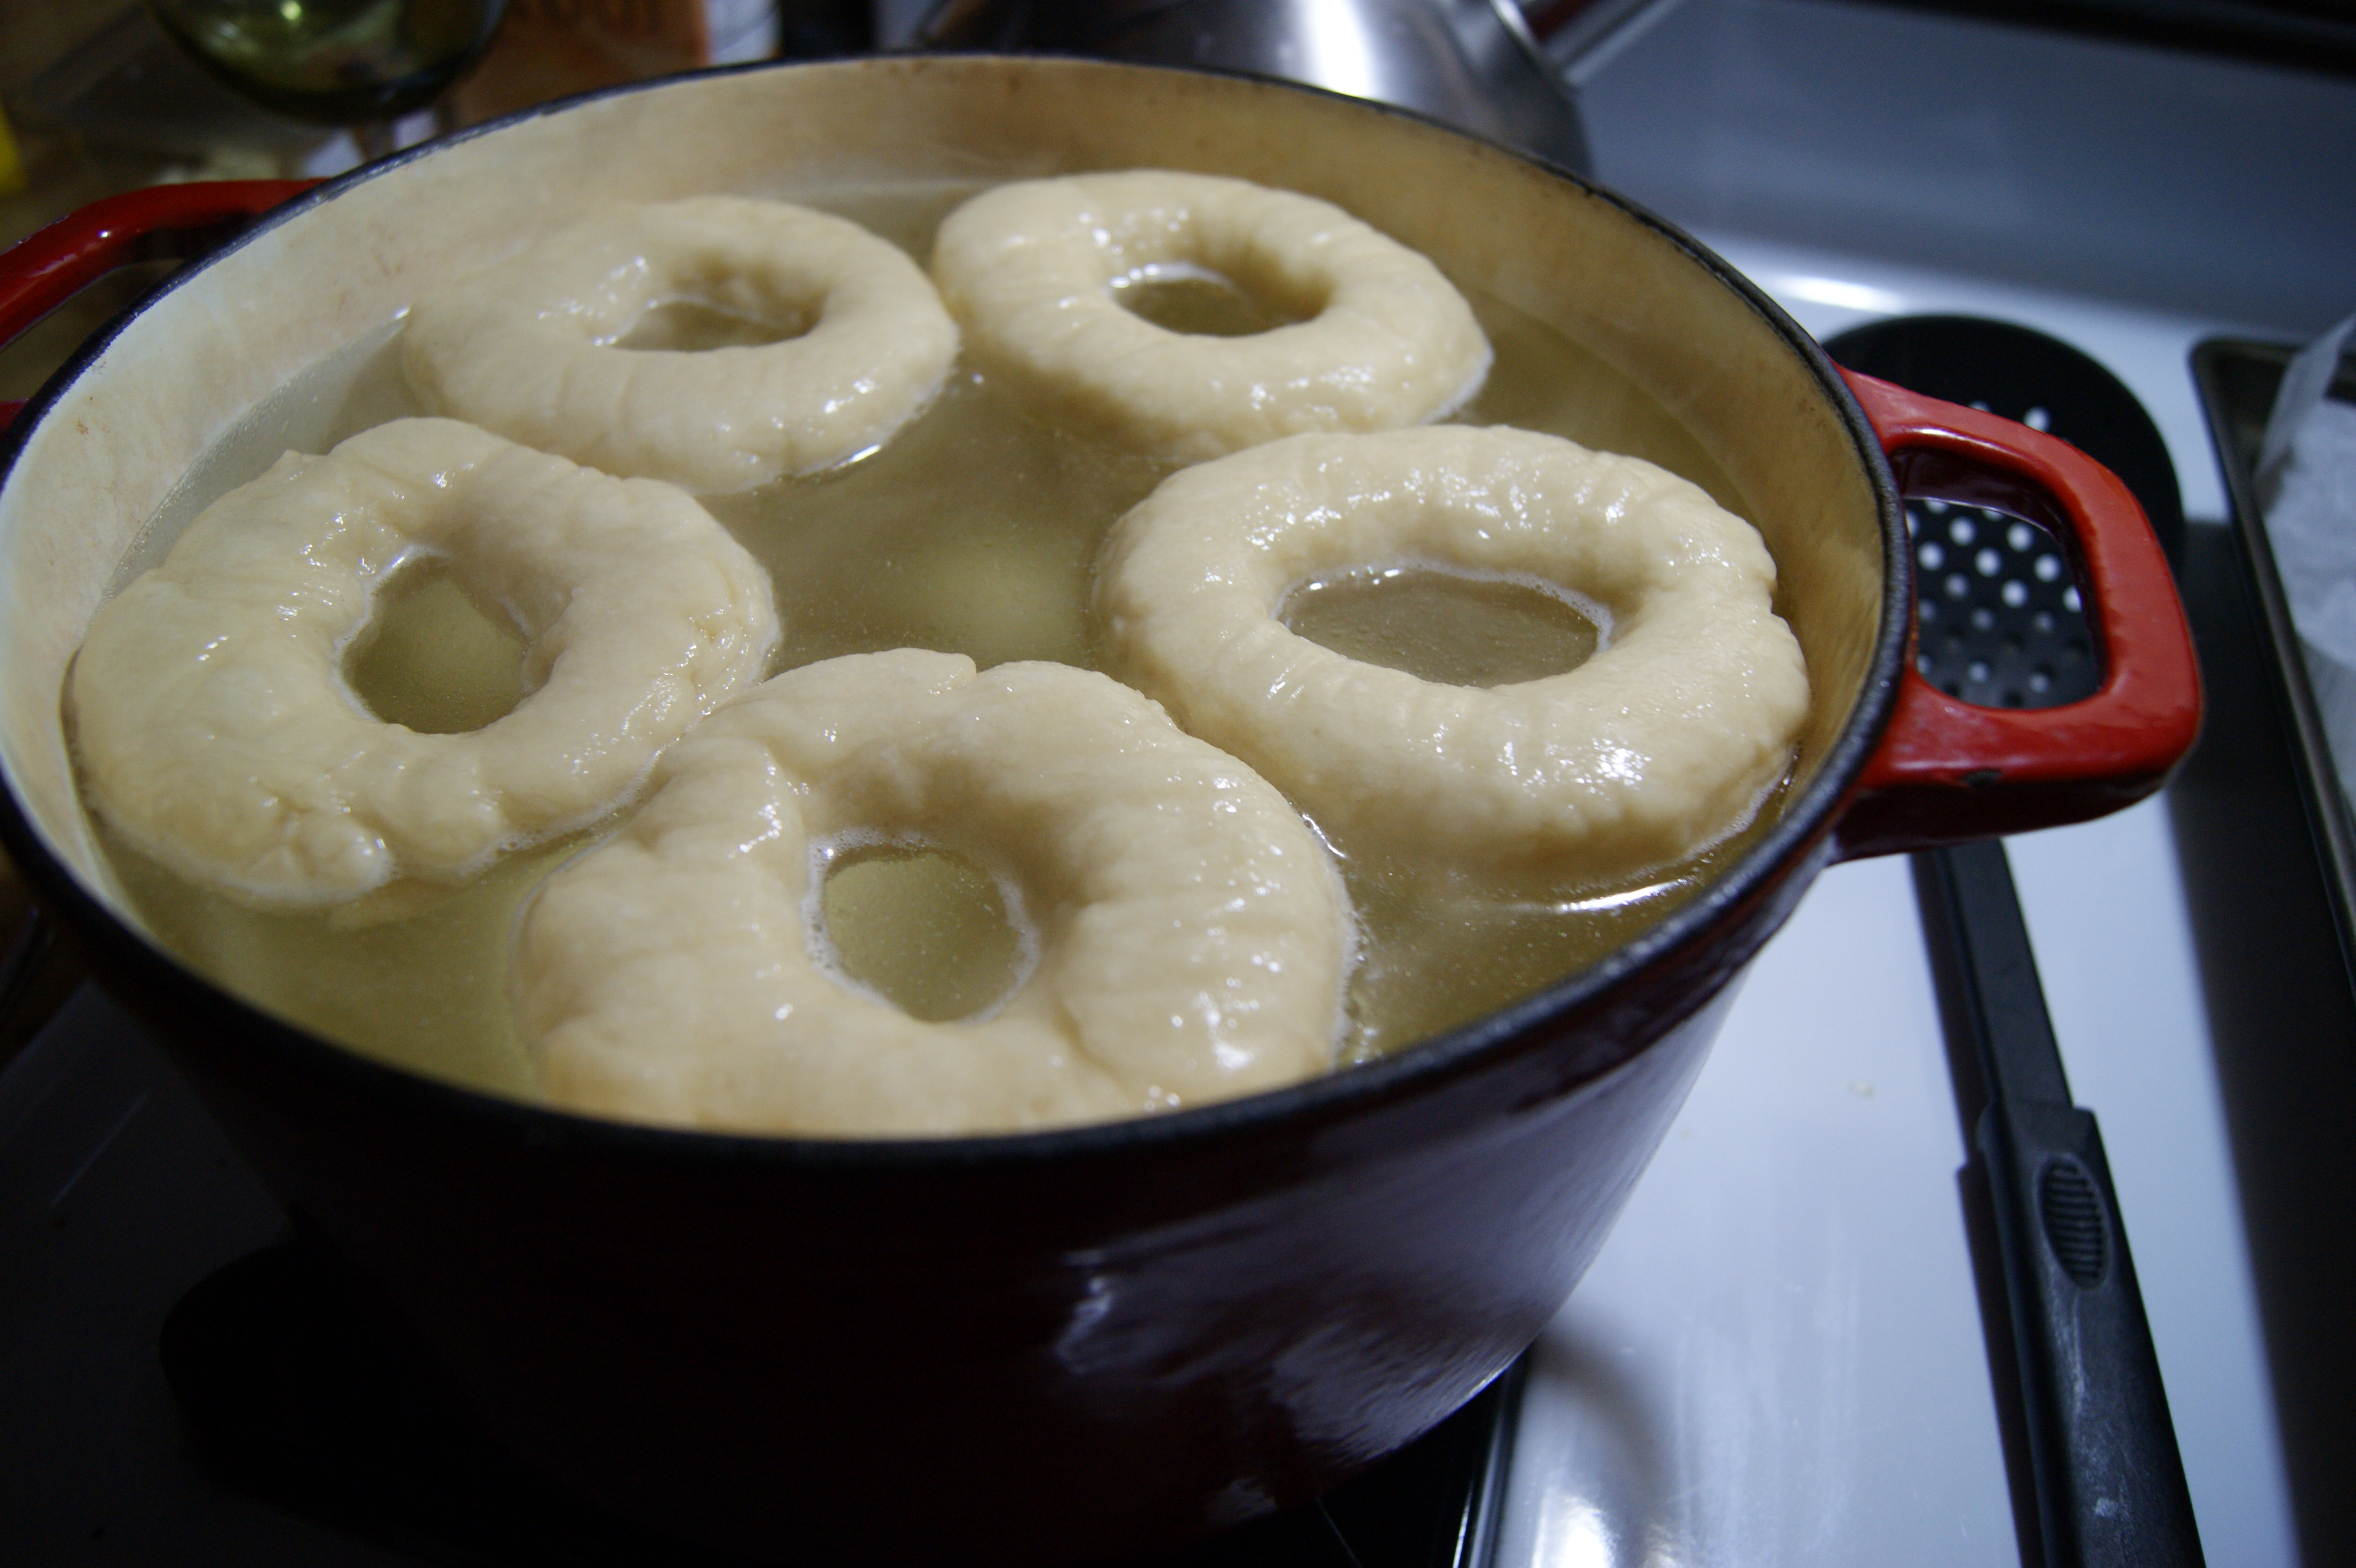
You'll need to do this in batches, but it's easier to just have a system where you can boil, bake, rotate and remove.

Bake for 5 minutes, then rotate your pan and bake for 5 minutes more. Bagels should be browned on top. Remove from pan onto a cooling rack or large platter.

Et voila! Bagels, from your very own kitchen. They were chewy, bready and delicous. Exactly what the doctor ordered on a snowy, icky New England weekend. Oh and they cost about $2 to make two dozen bagels. Score one for the Tiny Wallet!!!!!

January 26, 2011
Quickie Dinner- Mike's Shepherd's Pie
Ally's note: Oh man, I love it when Mike cooks. He always make something spicy, comforting and quick. It's the perfect dinner, everytime. Hmm...why don't I have him cook more often?
Anyway, this is one of our favorite recipes. Try it and I promise, you'll love it.
Spicy Shepherd's Pie
Preheat the oven to 350f.
Peel, cube and boil 3 potatoes or sweet potatoes. Drain and mash. You can add milk or butter, we like to add low-fat cream cheese. Set aside.

In a frying pan, add one chopped onion, two cloves of chopped garlic and 1 lb. of ground beef or turkey. Cook until it's brown. Drain, if there is any liquid. Season with some cumin, chili powder, garlic powder- whatever spices you like. Or you could add half of a package of taco seasoning in there. Move to a bowl and add 2 tbsp of butter and 2 tbsp of flour to the pan. Stir until it's combined and add cup of chicken broth. Make sure you stir this really good or else it will get lumpy. When it's thickened, add meat back in. Now put in some frozen corn, peppers or whatever else you like.

Pour into a baking pan and top with the potatoes and some grated cheese. Bake for about 20 minutes, until the cheese is nice and melted.

We top this with salsa or pico de gallo (recipe here) and some sour cream.
Anyway, this is one of our favorite recipes. Try it and I promise, you'll love it.
Spicy Shepherd's Pie
Preheat the oven to 350f.
Peel, cube and boil 3 potatoes or sweet potatoes. Drain and mash. You can add milk or butter, we like to add low-fat cream cheese. Set aside.

In a frying pan, add one chopped onion, two cloves of chopped garlic and 1 lb. of ground beef or turkey. Cook until it's brown. Drain, if there is any liquid. Season with some cumin, chili powder, garlic powder- whatever spices you like. Or you could add half of a package of taco seasoning in there. Move to a bowl and add 2 tbsp of butter and 2 tbsp of flour to the pan. Stir until it's combined and add cup of chicken broth. Make sure you stir this really good or else it will get lumpy. When it's thickened, add meat back in. Now put in some frozen corn, peppers or whatever else you like.

Pour into a baking pan and top with the potatoes and some grated cheese. Bake for about 20 minutes, until the cheese is nice and melted.

We top this with salsa or pico de gallo (recipe here) and some sour cream.
January 14, 2011
Spicy Chicken "Lasagna"
Sometimes the best laid-plans just don't work out. I had been dreaming about a steaming hot bowl of the Pioneer Woman's Chicken Tortilla Soup (you may have noticed that I mention PW every 1 in 3 posts- obsessed much?) all of yesterday. When I got home and began preparing to make it, however, I neglected to read the cook/simmer times (rookie mistake!). The problem? We were hungry like...10 minutes ago. Since I had already roasted off the chicken breasts, I needed a plan B. I still wanted that spicy, tomato-ey taste that I'd get from the tortilla soup, just quicker.
Enter the "lasagna". It's obviously not a real lasagna, but a layered casserole made with spicy chicken, creamy beans and tomatoes and layers of corn tortilla. And let me tell you- it was super delicious. Here's how you can make it in your very own kitchen!
Spicy Chicken "Lasagna"
2 boneless, skinless chicken breasts (we made a whole pound because they're yummy!)
2 tsp. cumin
1 tsp. chili powder
2 tsp. garlic powder
1 tsp. salt
2 tbsp. olive oil
1 onion, diced
3 cloves garlic, minced
1 can Ro-tel (or tomatoes and chili)
1- 28 oz. can black beans, drained
3 tbsp. cream cheese
12 6-inch corn tortillas
1 c. sharp cheddar
cilantro for garnish (optional)
Preheat oven to 400°f. Rinse and dry chicken breasts. Arrange on a baking sheet. Sprinkle with olive oil.
 Combine the cumin, chili powder, salt and garlic powder.
 Coat each breast with the spice mixture.
 Roast for 20 minutes or until done.
While the breasts are cooling, add the onion and garlic to a pan with a little oil. Saute until translucent, about 5 minutes over medium heat.
 Add Ro-tel, drained black beans and cream cheese and mix. Continue to stir until the cream cheese has melted.
 At this point, shred the chicken with two forks or chop roughly.
 Begin assembling your "lasagna" by layering corn tortilla halves on the bottom of a casserole dish or dutch oven.
 Next, add a layer of the bean mixture and a layer of chicken.
 Top with another layer of tortillas, bean mixture and chicken. Finish it off with a top layer of tortillas and some cheese, if desired. I added some jalapeños and tomatoes to the top of mine. Bake for 15-20 minutes, or until the cheese is melted and the inside is hot.
 Garnish with cilantro, more cheese, pico de gallo or just eat as it is!
 Not too shabby for plan B!
Enter the "lasagna". It's obviously not a real lasagna, but a layered casserole made with spicy chicken, creamy beans and tomatoes and layers of corn tortilla. And let me tell you- it was super delicious. Here's how you can make it in your very own kitchen!
Spicy Chicken "Lasagna"
2 boneless, skinless chicken breasts (we made a whole pound because they're yummy!)
2 tsp. cumin
1 tsp. chili powder
2 tsp. garlic powder
1 tsp. salt
2 tbsp. olive oil
1 onion, diced
3 cloves garlic, minced
1 can Ro-tel (or tomatoes and chili)
1- 28 oz. can black beans, drained
3 tbsp. cream cheese
12 6-inch corn tortillas
1 c. sharp cheddar
cilantro for garnish (optional)
Preheat oven to 400°f. Rinse and dry chicken breasts. Arrange on a baking sheet. Sprinkle with olive oil.
 Combine the cumin, chili powder, salt and garlic powder.
 Coat each breast with the spice mixture.
 Roast for 20 minutes or until done.
While the breasts are cooling, add the onion and garlic to a pan with a little oil. Saute until translucent, about 5 minutes over medium heat.
 Add Ro-tel, drained black beans and cream cheese and mix. Continue to stir until the cream cheese has melted.
 At this point, shred the chicken with two forks or chop roughly.
 Begin assembling your "lasagna" by layering corn tortilla halves on the bottom of a casserole dish or dutch oven.
 Next, add a layer of the bean mixture and a layer of chicken.
 Top with another layer of tortillas, bean mixture and chicken. Finish it off with a top layer of tortillas and some cheese, if desired. I added some jalapeños and tomatoes to the top of mine. Bake for 15-20 minutes, or until the cheese is melted and the inside is hot.
 Garnish with cilantro, more cheese, pico de gallo or just eat as it is!
 Not too shabby for plan B!
January 10, 2011
Tiny Wallet Style's Thrifty Kitchen Essentials
It's no secret that we love to be in the kitchen, preferably with the stove full of bubbling pots and something delicious in the oven. If you're NOT cooking crazy like us, you may be resolving to figure it out this year and we're here to help!!
One major hurdle to getting your dinner on is the lack of proper cooking equipment. Fear not, frugal friends, because you can hook up your kitchen for mere pennies (well, not really, but still...). Here's what we consider to be the bare essentials of cooking a great meal. If you're curious about specs/prices, follow the "Found Here" link to the website. We aren't endorsing any of these products nor are we being paid to advertise for them. We just think they would work well in a beginner's kitchen! Do you have any favorite thrifty kitchen items?? Comment and let us know!
1) 2-quart Saucepan
Get one big enough for making pasta or rice. This doesn't have to be super fancy since you're mostly using it for boiling and simmering.

(Found here)
2) Saute Pan with lid
Heavy bottom, skip the non-stick and make sure it has a tight-fitting lid. This will be your biggest investment, but you'll definitely use it the most. Oh, and we like one with a handle that can go into the oven!
 (Found Here)
3) Pyrex Bowls Set
This isn't an absolute necessity, but we have found that a good set of serveware/storage bowls can save you a ton of cash otherwise spent on disposable plastic containers.

(Found here)
A Good Spoon and Spatula
You need a good (non-metal) spoon!! A study bamboo one will take you from scraping the bottom of a sauce pan to stirring up a thick batter with no problem. For a spatula, we recommend something non-metal (silicon or heat-proof plastic). Make sure it's relatively thin and strong.

(Found Here)
Measuring Spoon/Cup Set
We recommend both a measuring cup set (for dry ingredients) and a measuring cup (like the one Pyrex makes) for liquid measures.

(Found Here)
Cutting Board Set
It's a good idea to have one cutting board set aside specifically for meat/fish so you don't have to worry about cross-contamination. With this color-coded set, it's easy!
 (Found Here)
Mixing/Serving Bowls
Get a few sizes of mixing bowls- you won't regret it. I love these glass ones because they're sturdy and durable. They also are great to go into the fridge with leftovers.
 (Found Here)
Chef Knife and Paring Knife
A good knife will change your life in the kitchen. You can spend $15 or $150 on a chef's knife, but regardless you're looking for it to be comfortable in your hand. I like a knife with some weight to it, as well as a firm connection between handle and blade. You should also invest in a paring knife for peeling, de-seeding and other small tasks.
 (Found Here)
One major hurdle to getting your dinner on is the lack of proper cooking equipment. Fear not, frugal friends, because you can hook up your kitchen for mere pennies (well, not really, but still...). Here's what we consider to be the bare essentials of cooking a great meal. If you're curious about specs/prices, follow the "Found Here" link to the website. We aren't endorsing any of these products nor are we being paid to advertise for them. We just think they would work well in a beginner's kitchen! Do you have any favorite thrifty kitchen items?? Comment and let us know!
1) 2-quart Saucepan
Get one big enough for making pasta or rice. This doesn't have to be super fancy since you're mostly using it for boiling and simmering.

(Found here)
2) Saute Pan with lid
Heavy bottom, skip the non-stick and make sure it has a tight-fitting lid. This will be your biggest investment, but you'll definitely use it the most. Oh, and we like one with a handle that can go into the oven!
 (Found Here)
3) Pyrex Bowls Set
This isn't an absolute necessity, but we have found that a good set of serveware/storage bowls can save you a ton of cash otherwise spent on disposable plastic containers.

(Found here)
A Good Spoon and Spatula
You need a good (non-metal) spoon!! A study bamboo one will take you from scraping the bottom of a sauce pan to stirring up a thick batter with no problem. For a spatula, we recommend something non-metal (silicon or heat-proof plastic). Make sure it's relatively thin and strong.

(Found Here)
Measuring Spoon/Cup Set
We recommend both a measuring cup set (for dry ingredients) and a measuring cup (like the one Pyrex makes) for liquid measures.

(Found Here)
Cutting Board Set
It's a good idea to have one cutting board set aside specifically for meat/fish so you don't have to worry about cross-contamination. With this color-coded set, it's easy!
 (Found Here)
Mixing/Serving Bowls
Get a few sizes of mixing bowls- you won't regret it. I love these glass ones because they're sturdy and durable. They also are great to go into the fridge with leftovers.
 (Found Here)
Chef Knife and Paring Knife
A good knife will change your life in the kitchen. You can spend $15 or $150 on a chef's knife, but regardless you're looking for it to be comfortable in your hand. I like a knife with some weight to it, as well as a firm connection between handle and blade. You should also invest in a paring knife for peeling, de-seeding and other small tasks.
 (Found Here)
January 8, 2011
Conquering Homemade Cinnamon Rolls
Mike and I have offered to host a casual brunch tomorrow at our house. Pot-luck, bring what you want, etc. How nice, you might say. Yes, nice indeed, until you get to the part about me offering to make homemade cinnamon rolls for said brunch. After reading the Pioneer Woman's Cinnamon Rolls 101, I've been slighty obsessed with making them. Reality time: I'm an unabashed carbohydrate addict. Give me bread, fresh from the oven and slather it in a creamy sugar frosting for good measure. It's my Kryptonite. But, having had many previous yeast bread disasters, I assumed that cinnamon rolls from scratch was out of my culinary repertoire.
Well, lovely and loyal readers, Tiny Wallet Style is about to blow your mind.

Well, lovely and loyal readers, Tiny Wallet Style is about to blow your mind.

January 3, 2011
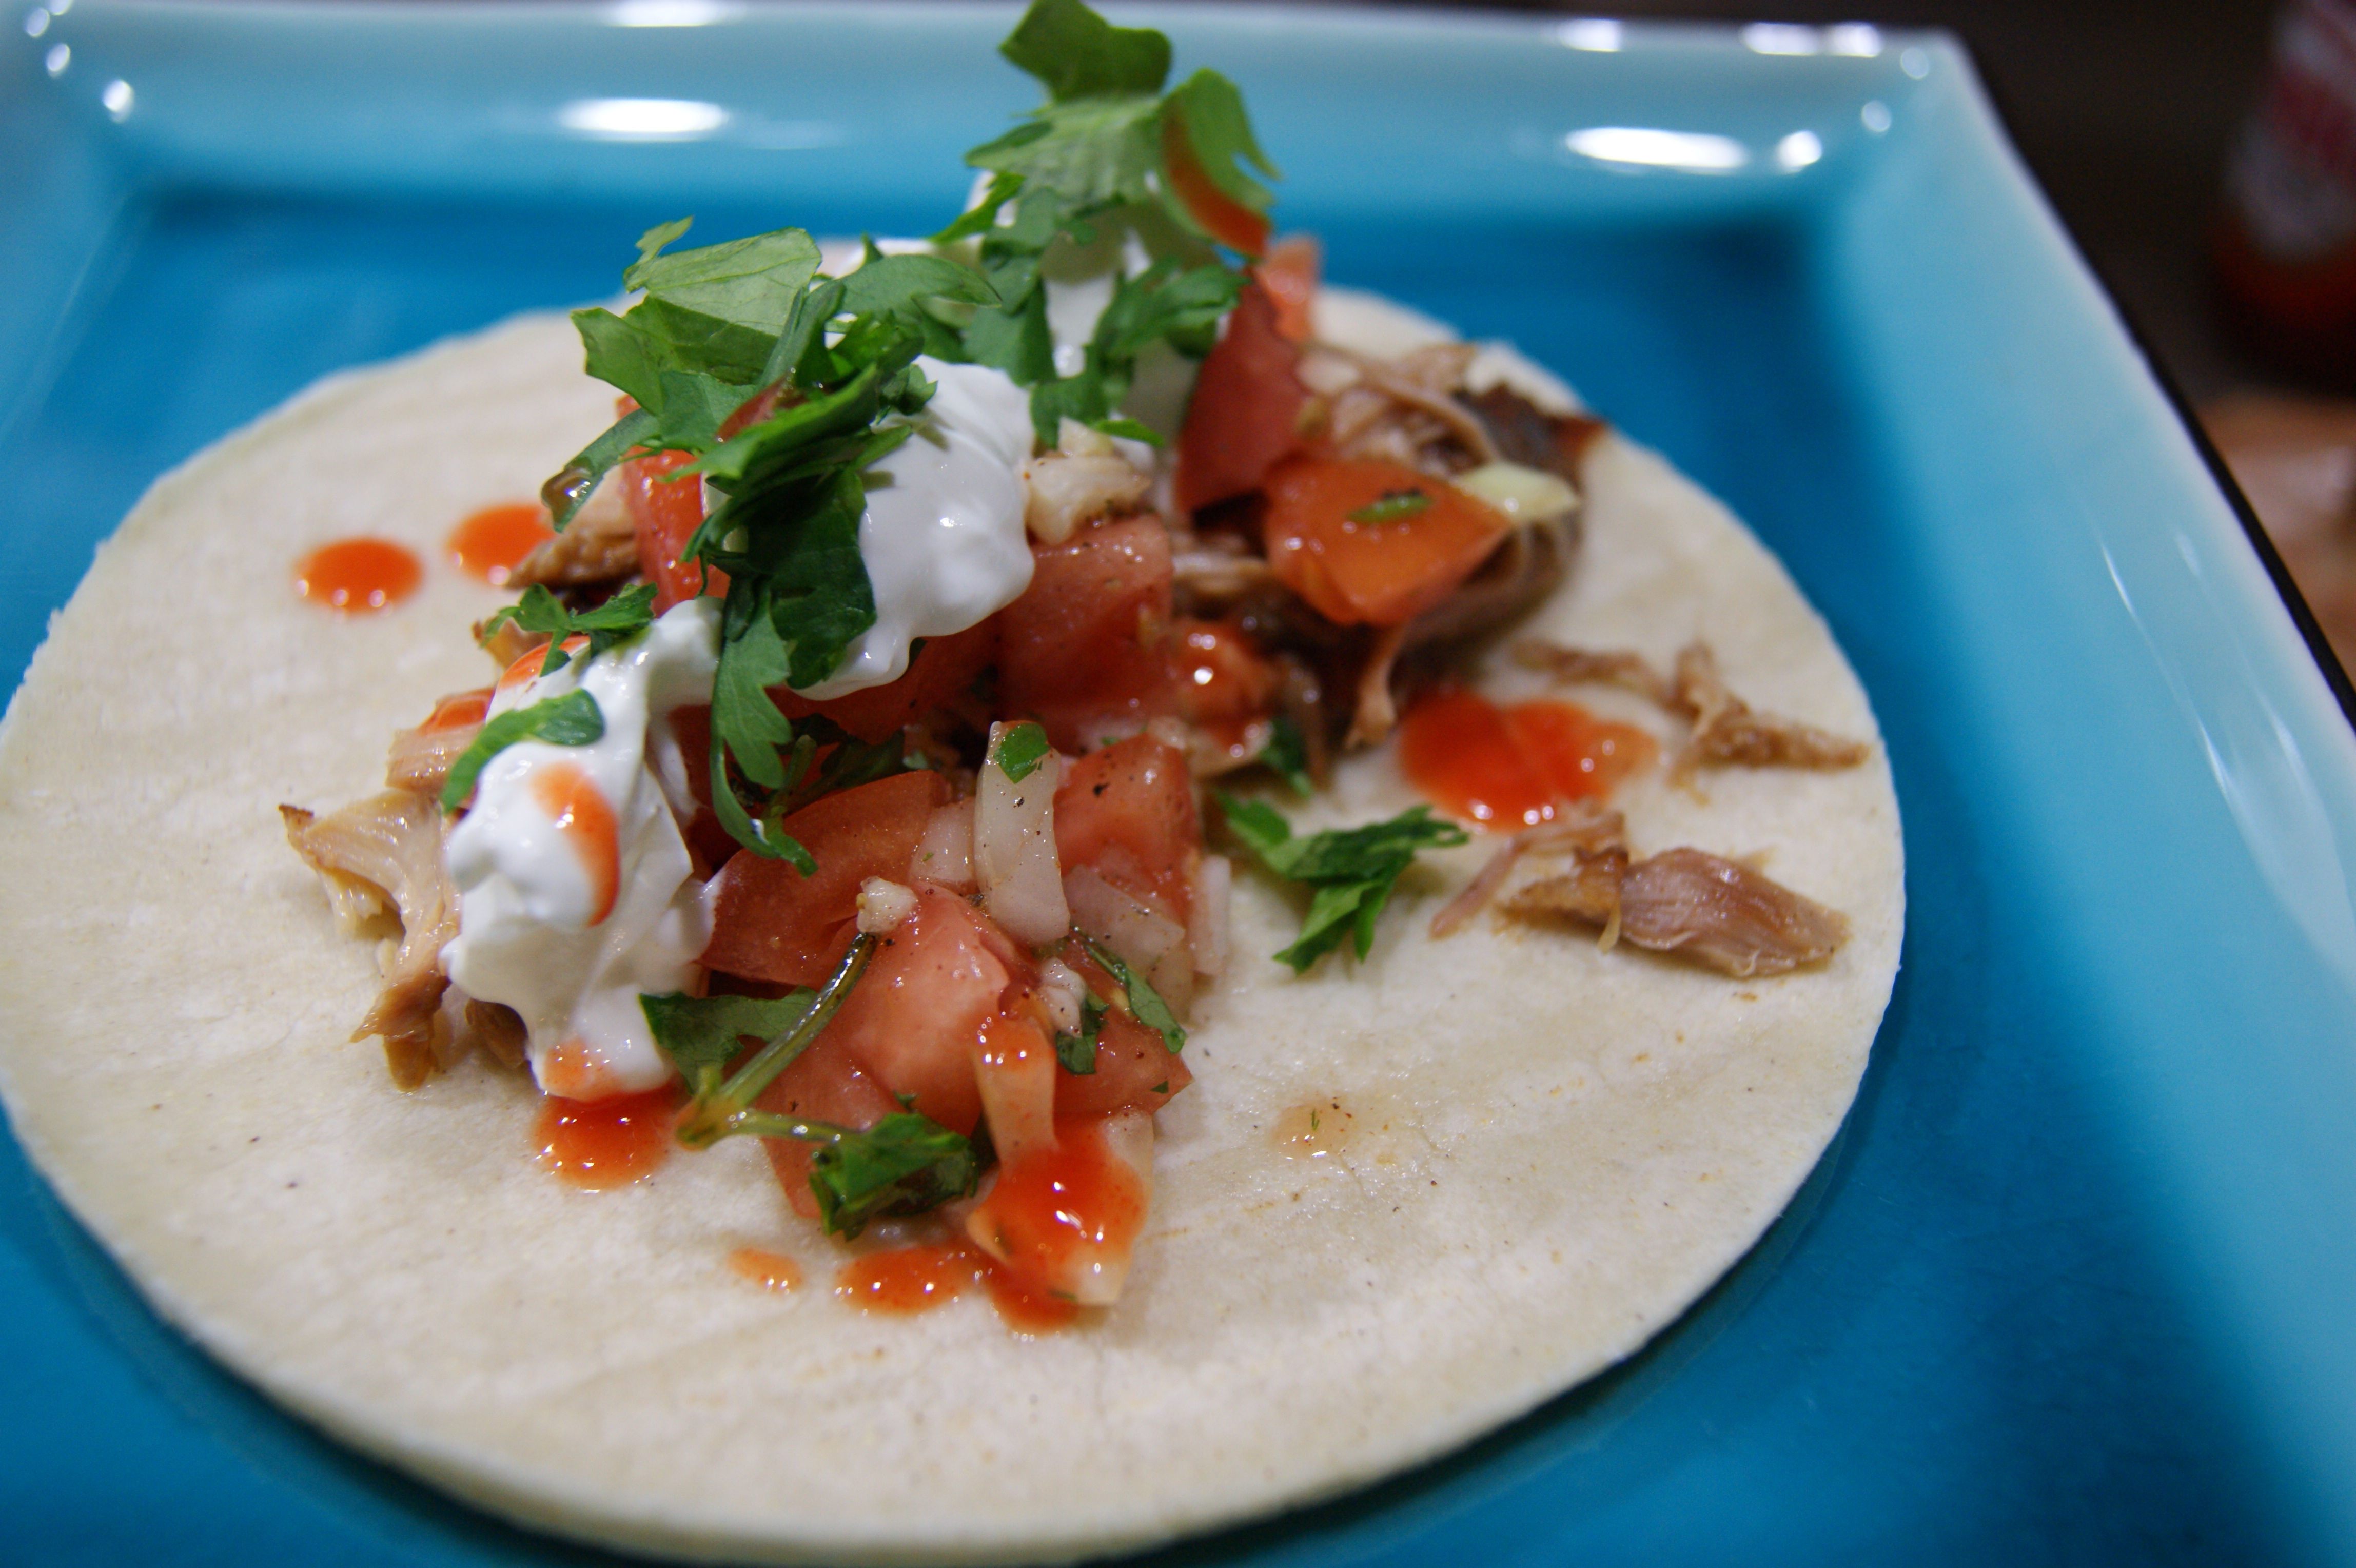
Slow Cooker Chicken Tacos
We love a good taco. Living in a neighborhood that has a huge immigrant population, we are lucky enough to try foods from all over Latin America. But we always come back to the humble taco. Not the Americanized, ground-beef, cheese-covered, crunchy shell kind of taco either. These babies are stuffed with tender chicken, homemade guacamole and pico de gallo, hot sauce and fresh cilantro all nestled inside a warm, soft corn tortilla. Oh my. My mouth is watering just thinking about it.

January 2, 2011
Aunt Maureen's Coffee Cake
We recently went to a family gathering where this cake was served. The recipe is courtesy of Mike's Aunt Maureen, who is adorable and wonderful and we love her. I was initially horrified when she recounted the ingredients, but then I tasted the cake and I was a changed woman. It ain't good for you, but it sure is tasty. And it only has 5 ingredients AND if you shop sales, it costs under $3.oo to make! (We got our cake mix on sale for $1/box and the pudding was $.79.)

Aunt Maureen's Coffee Cake
Makes 2 9-inch loaf pans or one tube pan
1 box yellow (not butter) cake mix (We use Betty Crocker)
1 box instant vanilla pudding (We use Jello brand)
1 c. sour cream
3/4 c. oil (whatever you have- we used safflower)
3 large eggs
1/3 c. sugar
2 tbsp. cinnamon

Mix together cake mix, pudding, sour cream, eggs and oil until smooth.

Spoon 1/2 of the batter into the bottom of you pan (or 1/4 into each loaf pan).

Sprinkle with half of the cinnamon-sugar mixture (or 1/4 per loaf pan) and cover with remaining batter. Top with remaining cinnamon-sugar. Bake at 350°f for 40 minutes and then cover with foil and bake an additional 10 minutes or until a toothpick comes out clean.
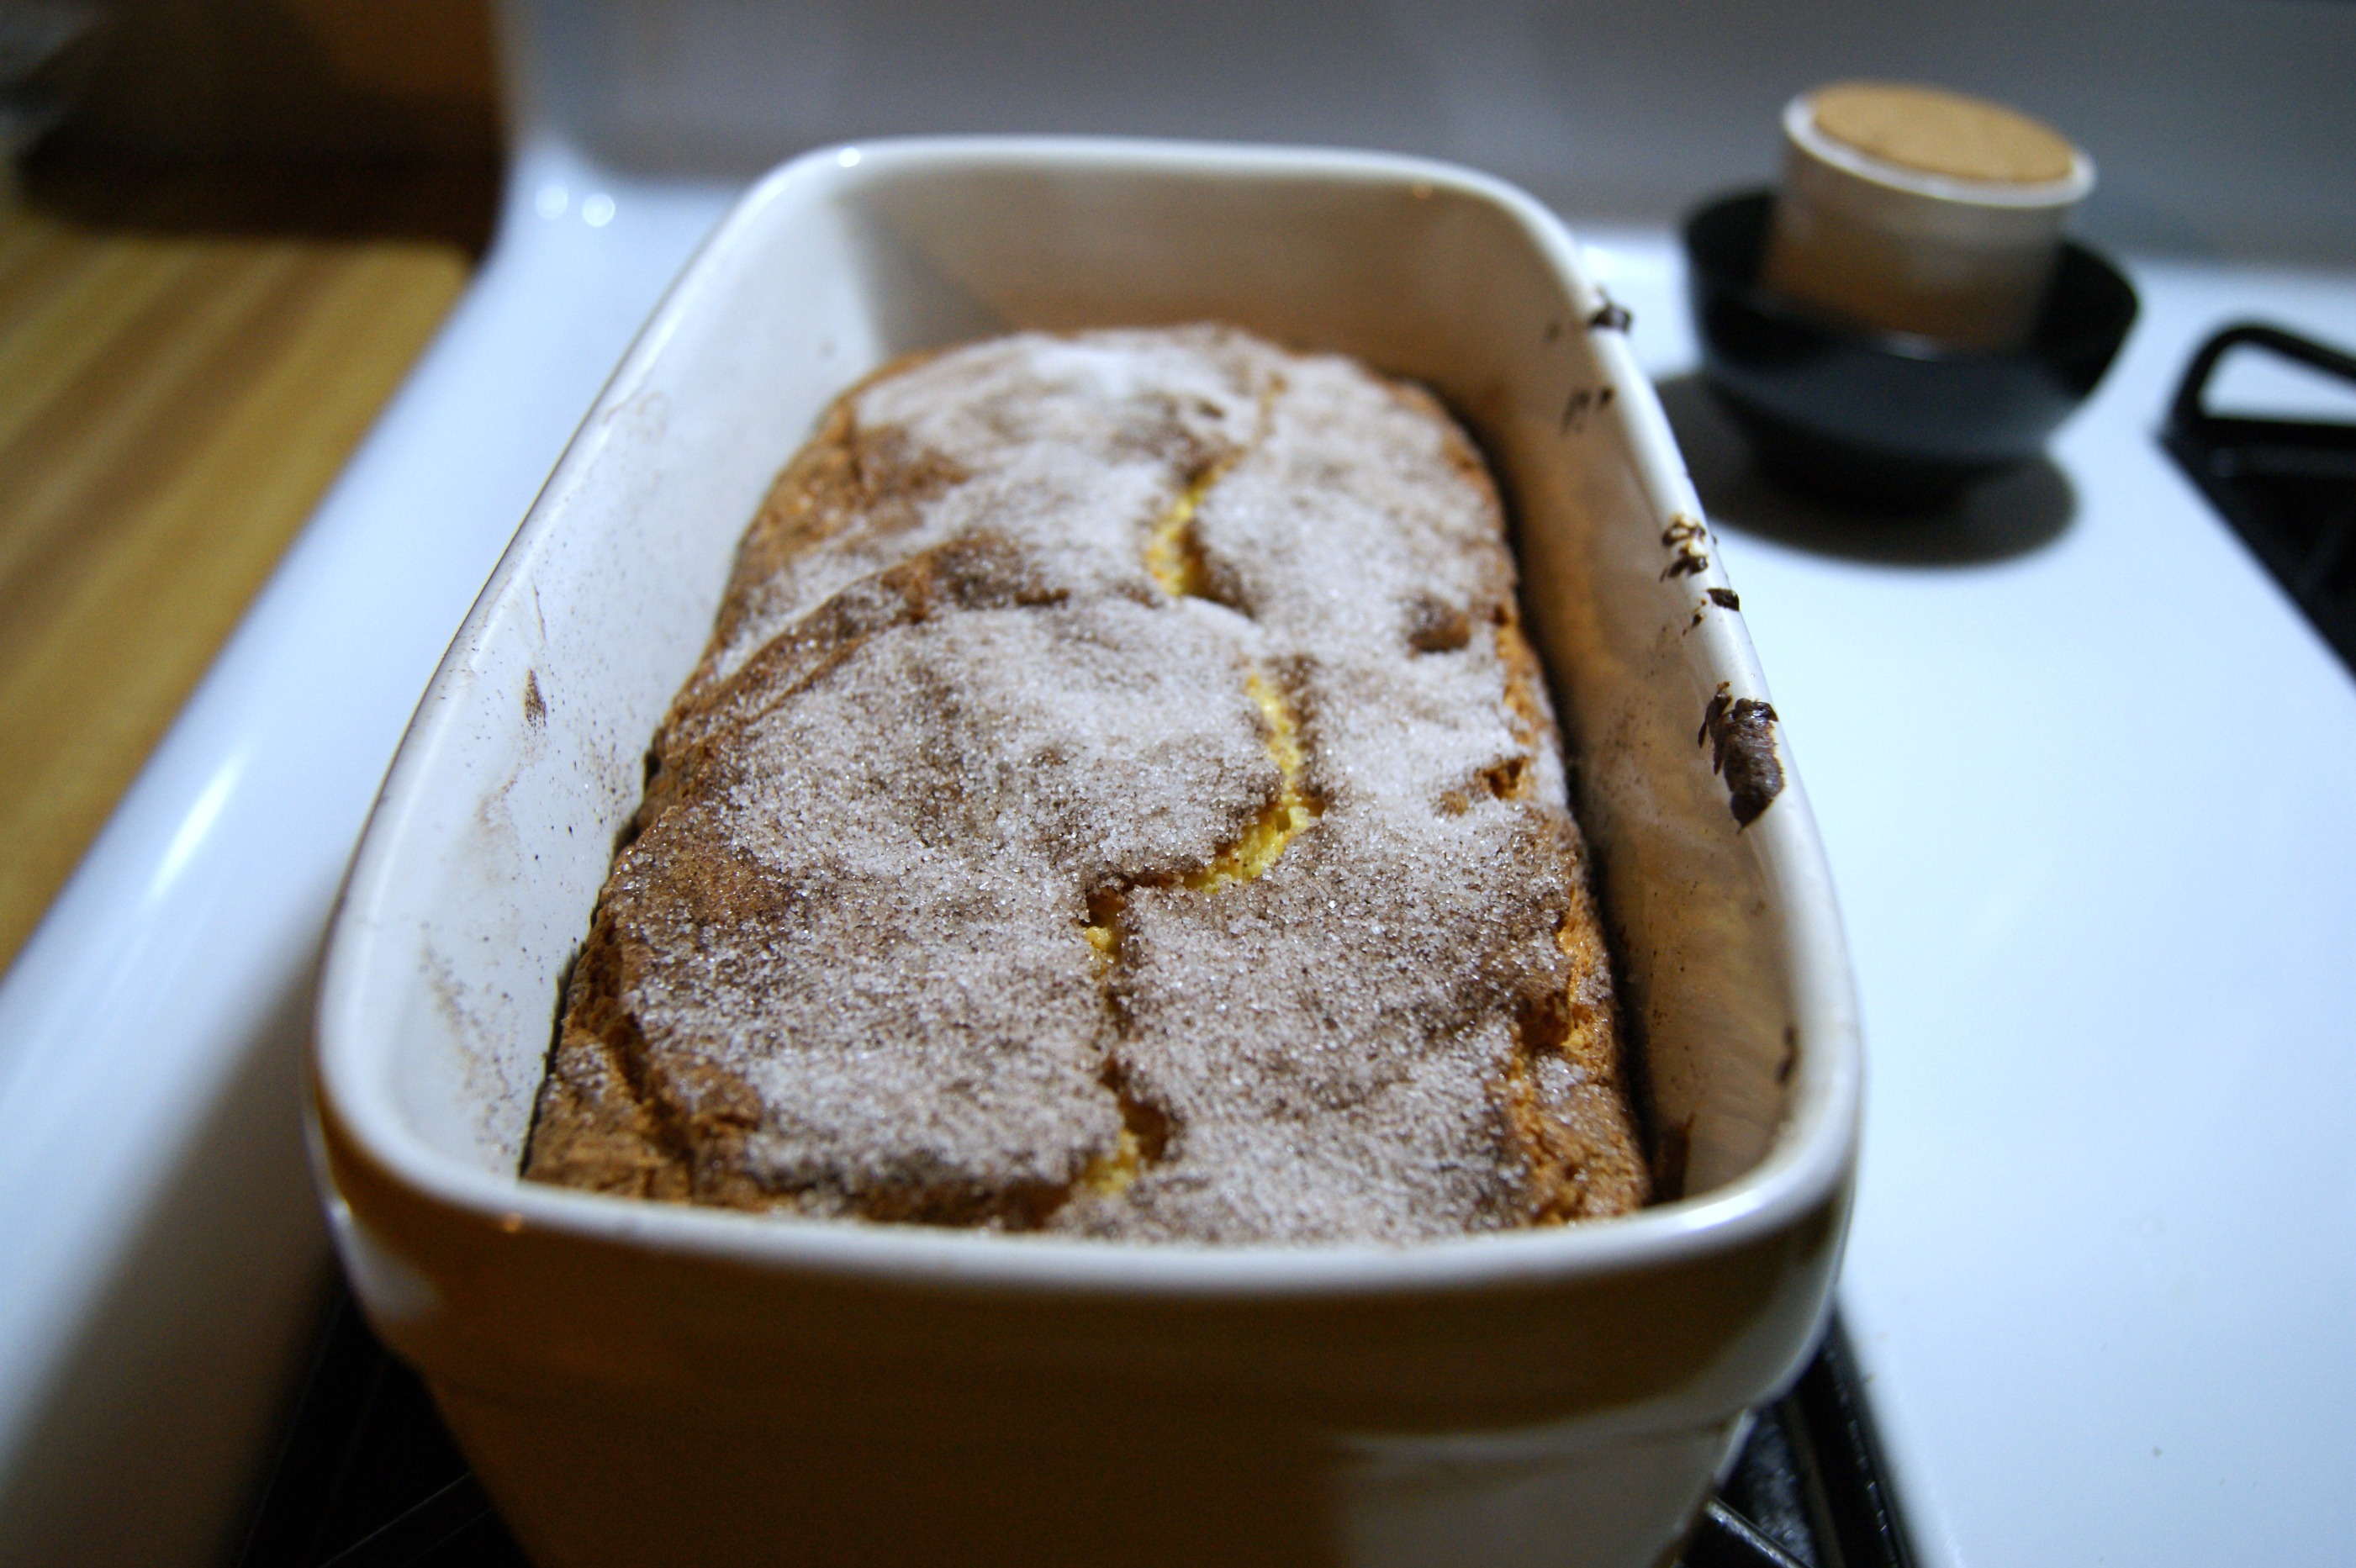
 Crunchy, soft, sweet. This is amazing served for breakfast, brunch or even dessert. Or 10pm when you pull it out of the oven. You know...
*You can add chopped nuts to this if you would like. Or top it with a yummy glaze. Or just slice it and enjoy the goodness.
Aunt Maureen's Coffee Cake
Makes 2 9-inch loaf pans or one tube pan
1 box yellow (not butter) cake mix (We use Betty Crocker)
1 box instant vanilla pudding (We use Jello brand)
1 c. sour cream
3/4 c. oil (whatever you have- we used safflower)
3 large eggs
1/3 c. sugar
2 tbsp. cinnamon

Mix together cake mix, pudding, sour cream, eggs and oil until smooth.
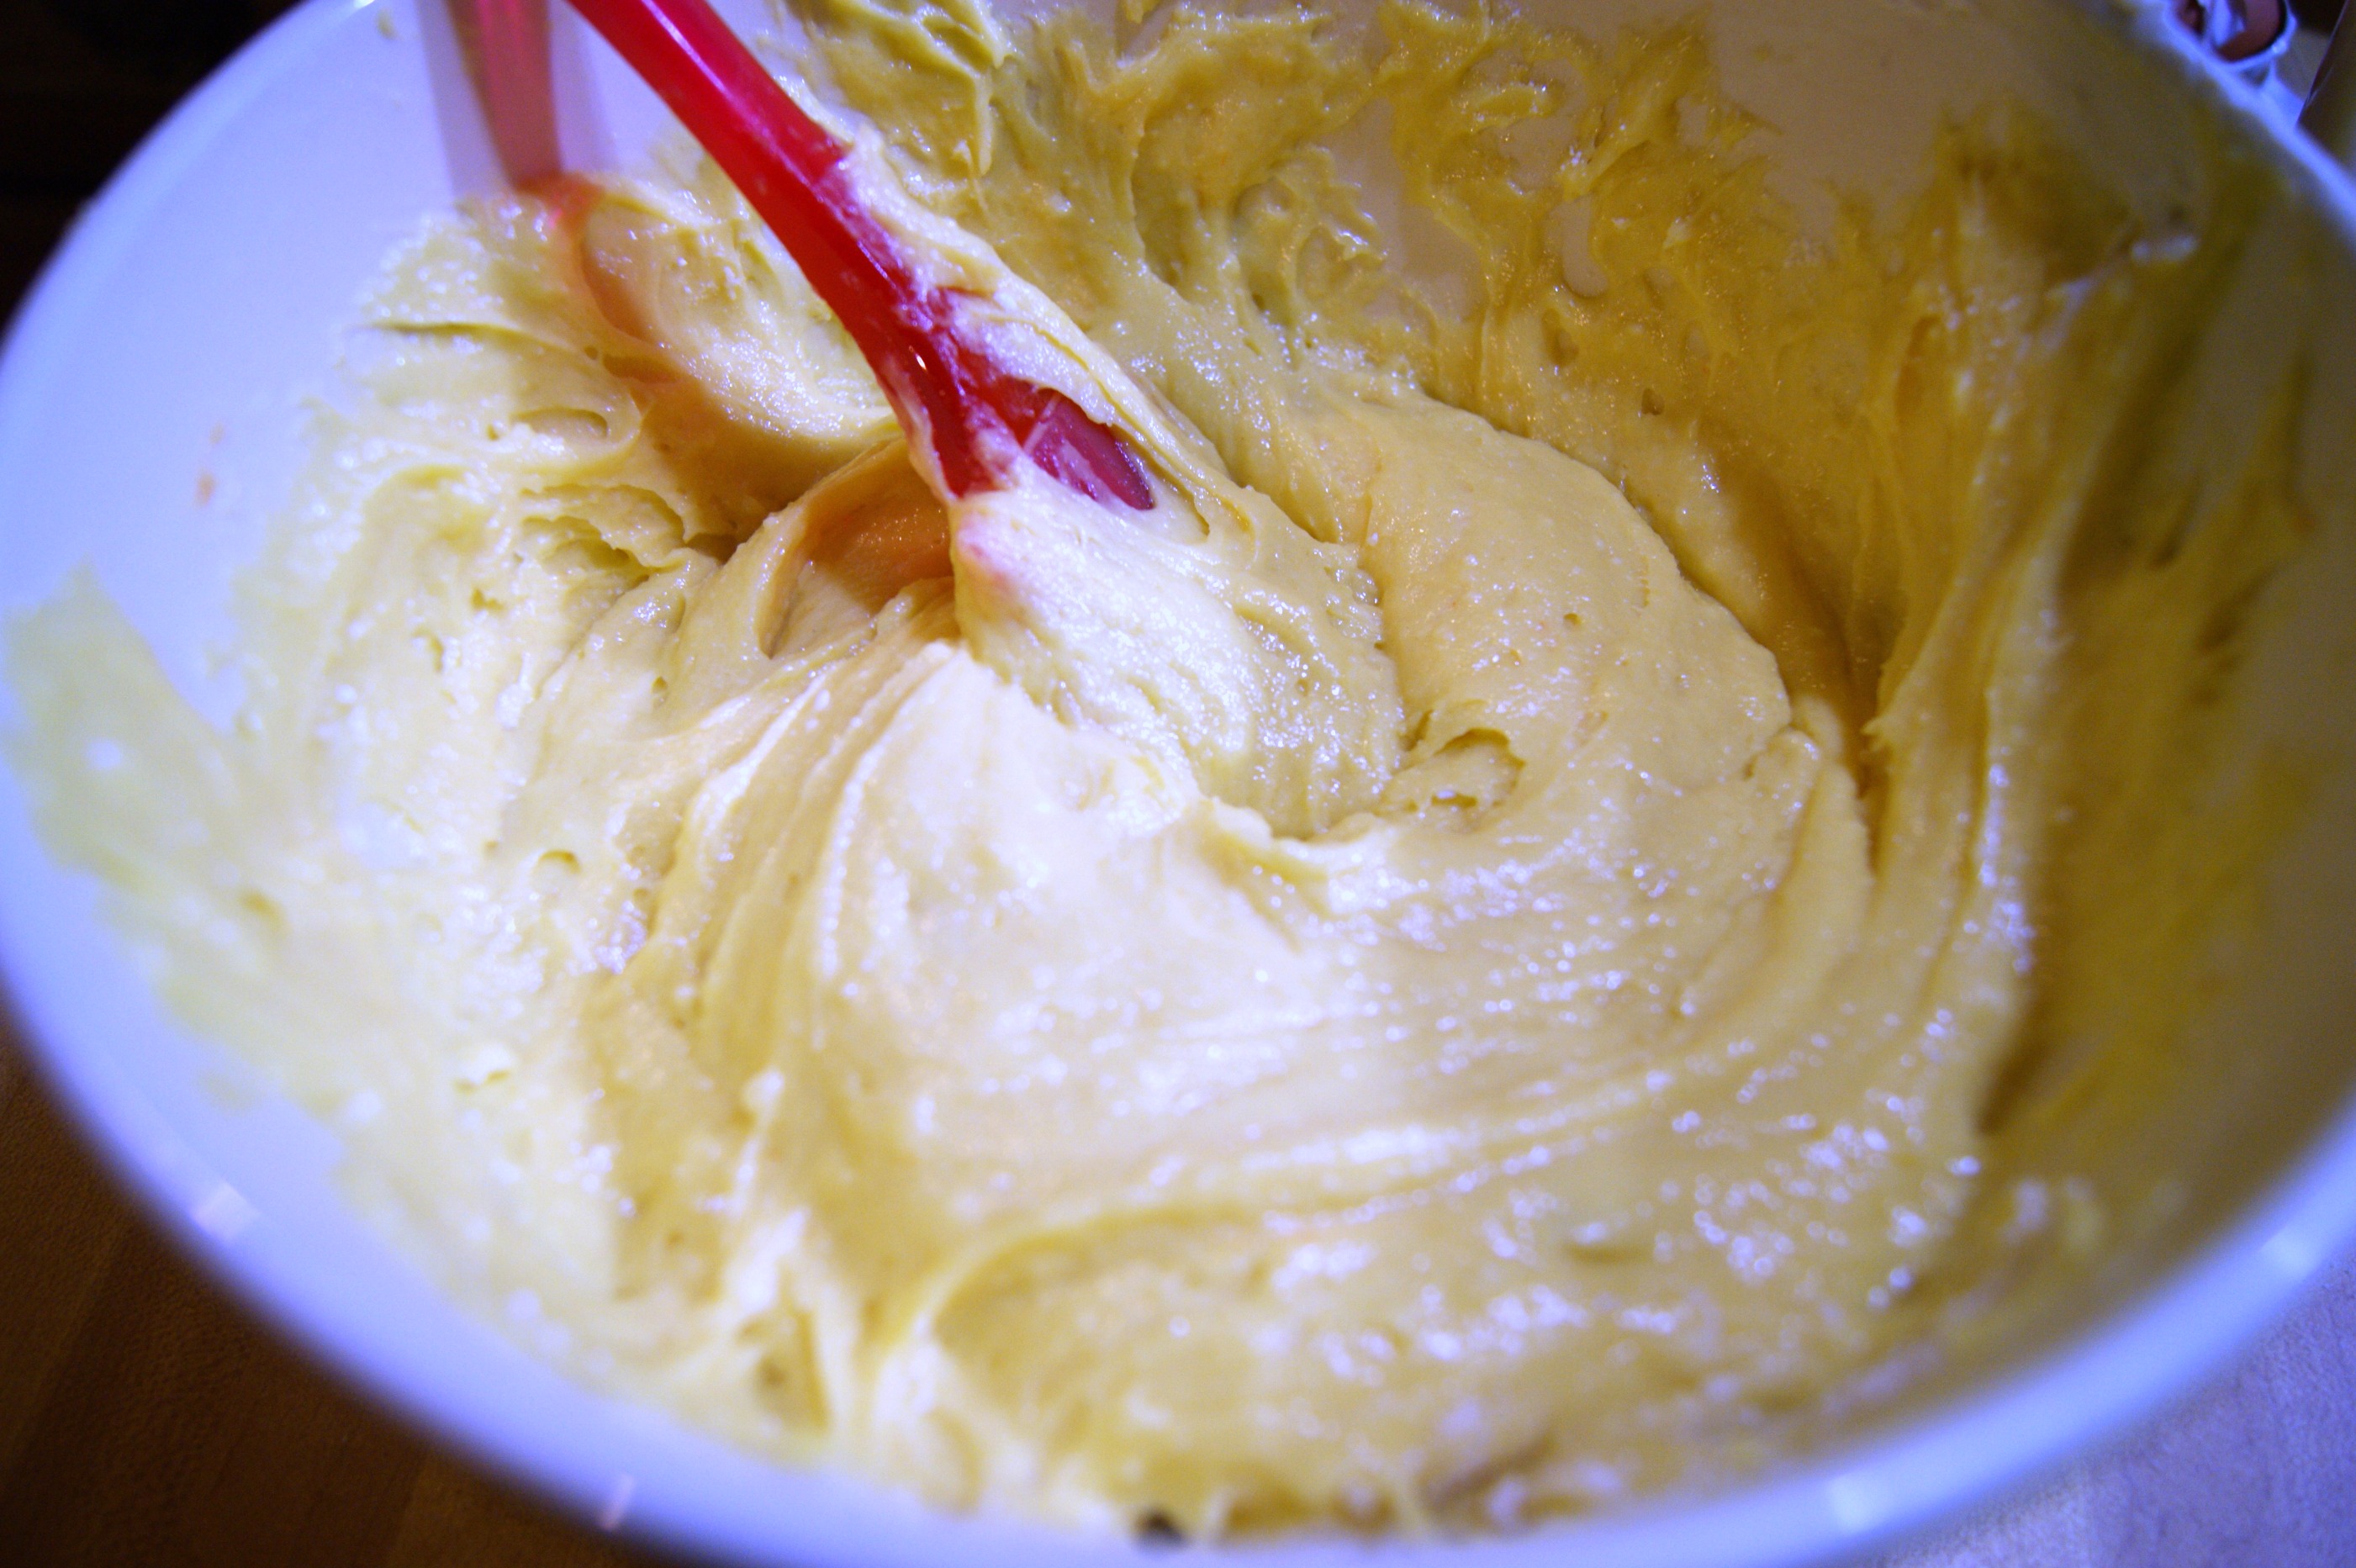
Spoon 1/2 of the batter into the bottom of you pan (or 1/4 into each loaf pan).
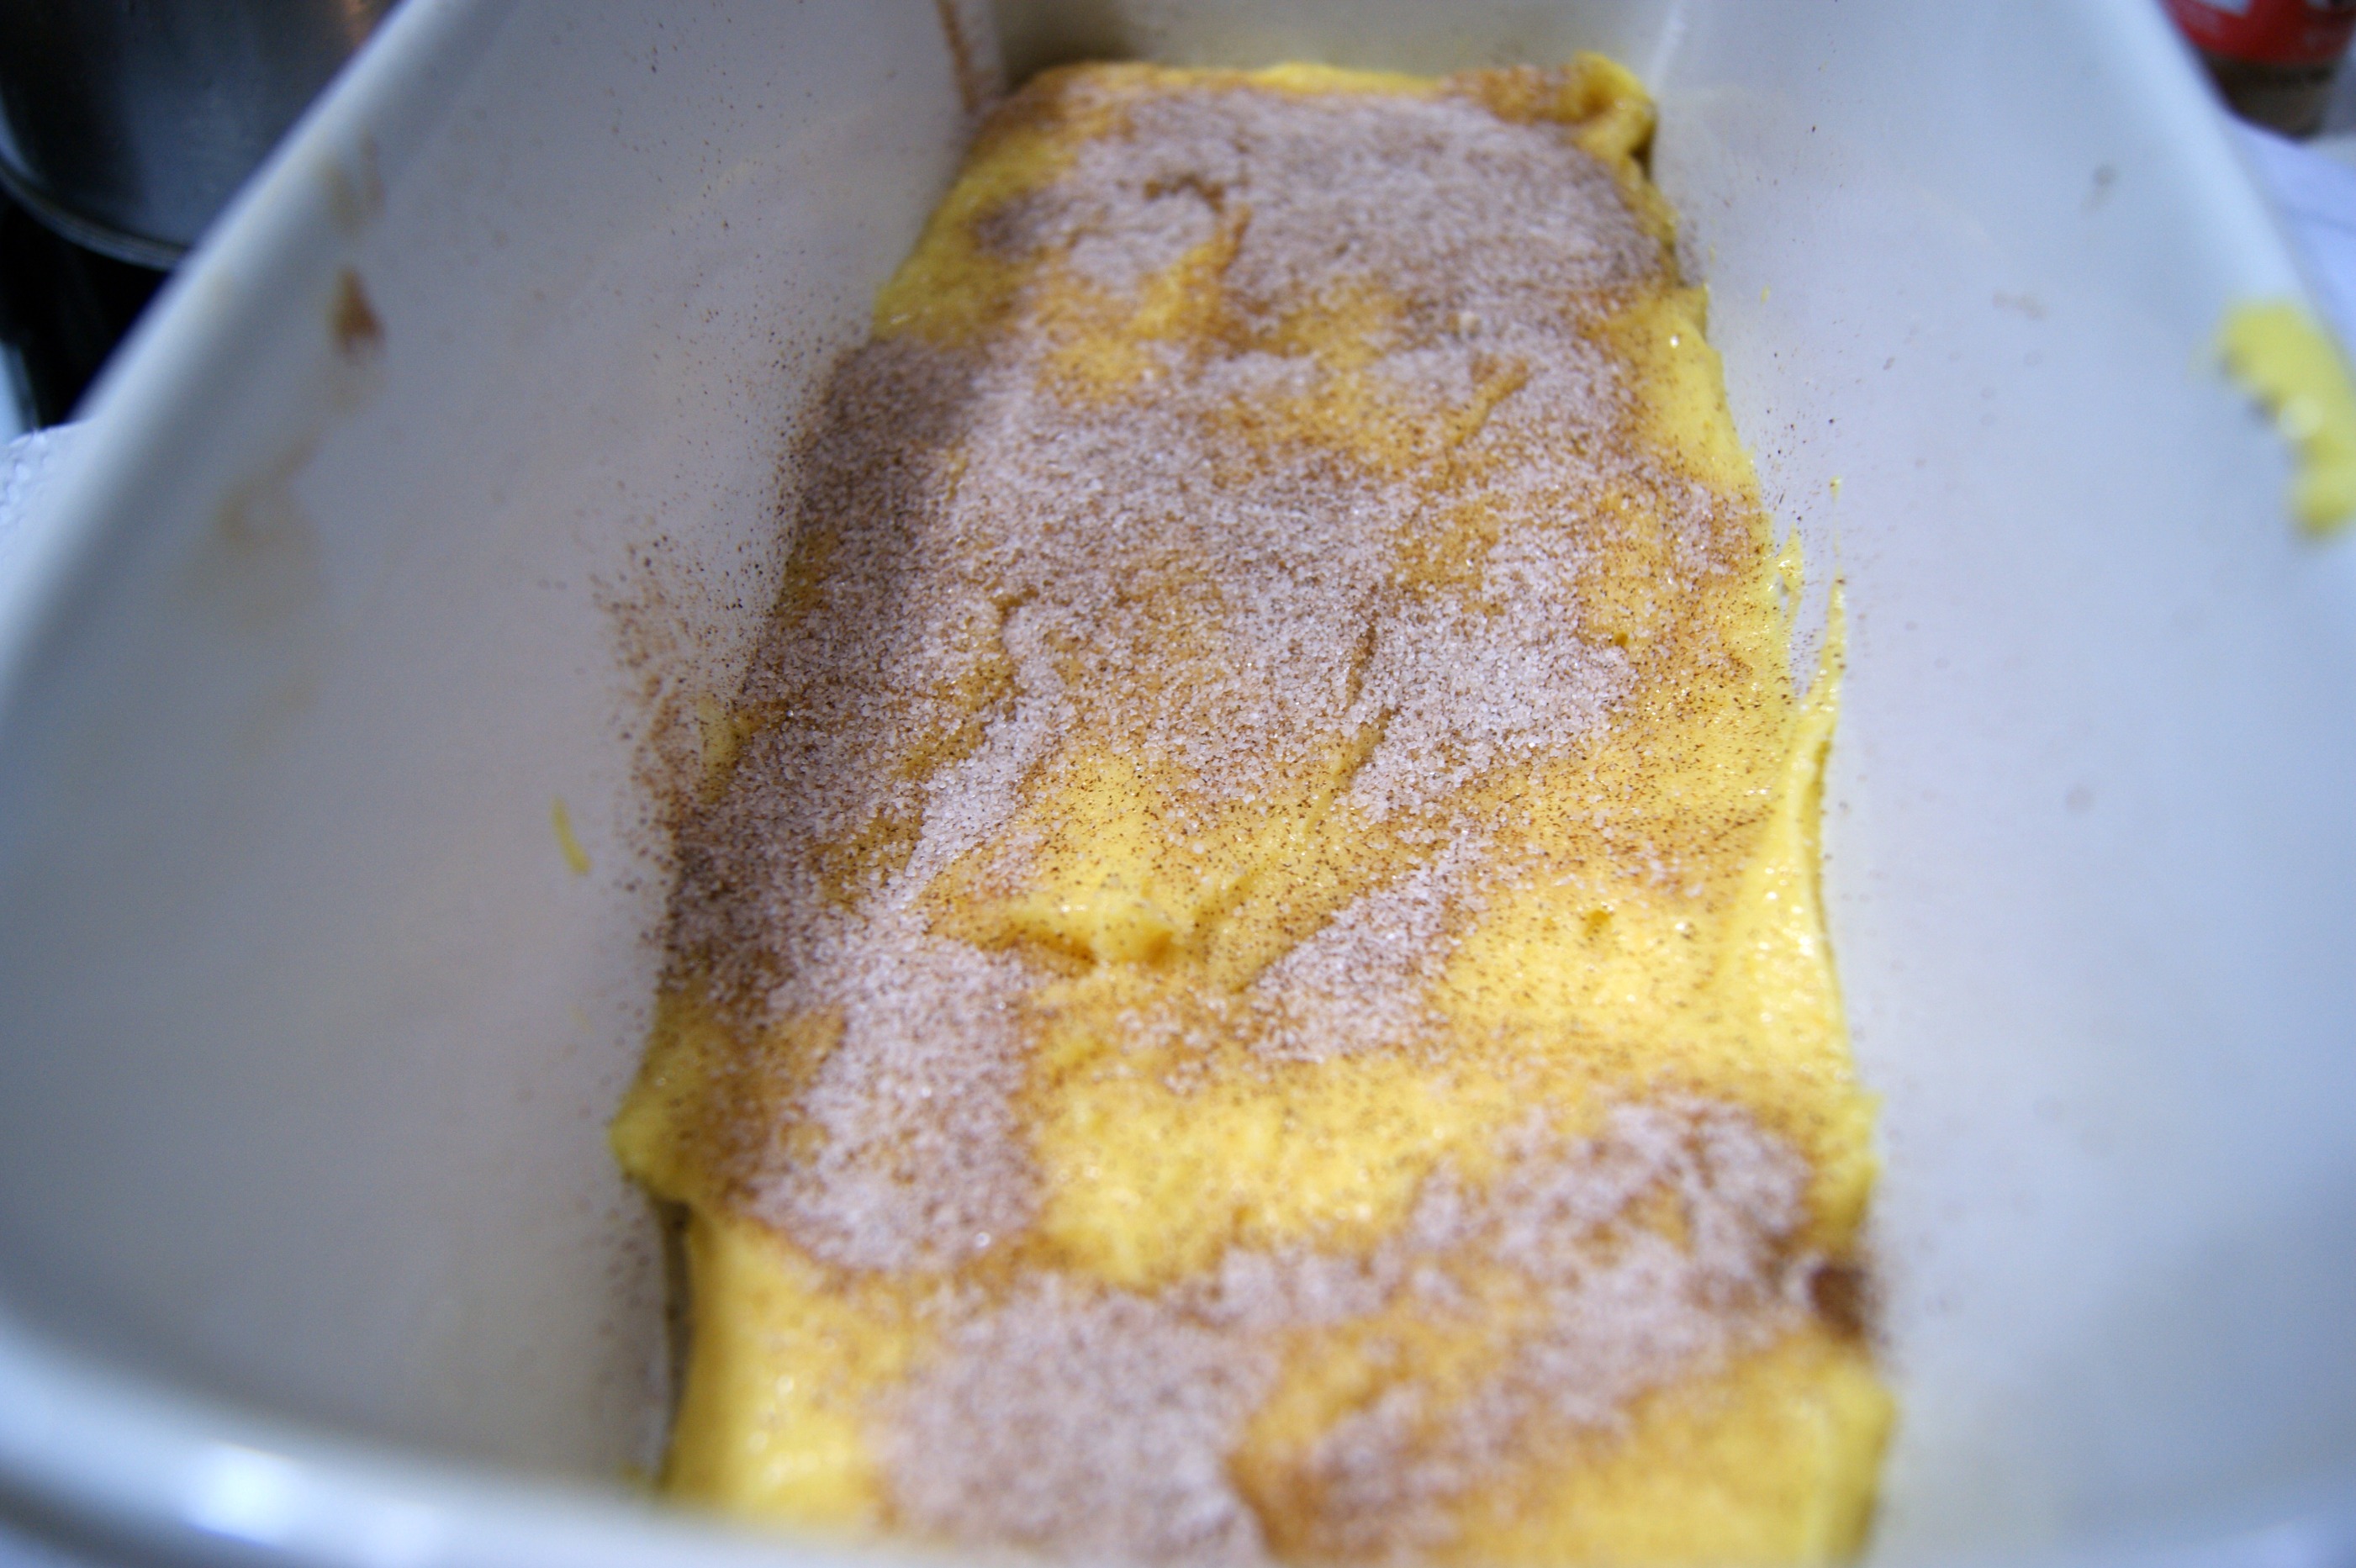
Sprinkle with half of the cinnamon-sugar mixture (or 1/4 per loaf pan) and cover with remaining batter. Top with remaining cinnamon-sugar. Bake at 350°f for 40 minutes and then cover with foil and bake an additional 10 minutes or until a toothpick comes out clean.
 Crunchy, soft, sweet. This is amazing served for breakfast, brunch or even dessert. Or 10pm when you pull it out of the oven. You know...
*You can add chopped nuts to this if you would like. Or top it with a yummy glaze. Or just slice it and enjoy the goodness.
December 21, 2010
The BEST Chocolate Cupcakes, Ever.
I decided, after a few days of being knocked out by a not so fun cold, that I would resume holiday baking today by making some cupcakes to bring to our family's Christmas Eve fiesta. After paging through a book of cupcake recipes, a few bookmarked websites and of course, The Joy of Baking, the lightbulb clicked on in my brain and I remembered a recipe I had seen on Tasty Kitchen a while back. It was aptly titled, "The Best Chocolate Sheet Cake. Ever." and it truly lives up to that name. Even the batter was absolutely delicious. We're topping them off with peppermint buttercream, but this cake would be just fiiiine on it's own. Enjoy!


December 19, 2010
Tiny Holidays: Matzoh Crack

Guys. Prepare yourselves for trying this if you have not. We call it matzoh crack for good reason: you literally can't stop eating it. Crunchy matzoh, sweet brown sugar caramel and creamy, melty dark chocolate. Swoon. If you have any plans whatsoever in the next week, make and bring this. And then prepare yourself to become the most popular person at the party. This is THAT good..
December 14, 2010
Simple Suppers: Pork Tenderloin Tacos

After a super blustery winter day here in New England, we were craving something spicy to warm us up. Enter: pork tenderloin tacos. Oh my goodness this is so easy, so delicious and (most importantly!) so cheap. The pork tenderloin cost us a mere $3 on sale and the rest of the stuff we had on hand. Check out how we did it, so you can have your very own delicious tacos for dinner tomorrow night!
Pork Tenderloin Tacos
December 10, 2010
Tiny Guest Blogger: Rebel Mel
Introducing first.... From the red corner. Weighing very little... She hails from Allston Massachusetts, and was rated byus as the best former roommate of the last decade. With 52 cookie recipes, 38 of them containing chocolate, and only 4 with nuts. She is, the COOKIE CHAMPION OF THE WORLD,
MISSSSSSSSSSSS
REBELLLLLLLLLLLL
MELLLLLLLLLLLLLLLLLLLLLLLLL!!!!!!!!!!!!!!!!!!!!!!!!!!!!!
Meet Melissa our great friend who has graced our pages as a guest blogger. Be sure to check out her amazing blog tweeded.com for some amazing cat and food photos (not combined!).
MISSSSSSSSSSSS
REBELLLLLLLLLLLL
MELLLLLLLLLLLLLLLLLLLLLLLLL!!!!!!!!!!!!!!!!!!!!!!!!!!!!!
Meet Melissa our great friend who has graced our pages as a guest blogger. Be sure to check out her amazing blog tweeded.com for some amazing cat and food photos (not combined!).
December 6, 2010
Tiny Holidays: Easy Shortbread Cookies
Guys. I awoke yesterday morning with a desperate need to bake 20 dozen cookies. Does that ever happen to you? I think it stems from the fact that my brain correlates Christmas decorations to baking cookies. As soon as the decorations are up, the cookies appear- just check out our "to-bake" list!! Our freezer, by next weekend, will be chock full of cylinders of dough waiting to be sliced and baked. If you want to get a jump on your cookie baking, here is my very favorite bake-ahead recipe- shortbread!


Quickie Dinner- Perfect Tomato Sauce
In honor of our recent monthly meal planning post, we decided to share with you the most versatile and delicious recipe in our cooking arsenal: tomato sauce. We use it for EVERYTHING. Pasta, obviously. Pizza sauce. A base for quick chili or minestrone soup. A simmer sauce for meatballs. It's so good I could eat it every night. We plan to make a huge batch and can it to give away as Christmas gifts along with some fresh pasta. Enjoy!


December 5, 2010
How We Meal Plan on a Budget
During the holidays, things get very hectic around Tiny Wallet HQ so naturally we slide on some normal household duties. The first thing, in past years, was cooking dinner. Instead, we'd opt for take out and going out to restaurants. Well, since the budget has gone into place, we realize that takeout and going out for dinner is a thing of the past. We had to change. Enter...the internet!
November 27, 2010
Tiny Holidays: Thanksgiving Wrap Up
Oh, hello. Didn't see you there from the haze of our food comas. We're finally able to waddle over to Tiny Blogging HQ to update you on our Thanksgiving feast, which was quite wonderful from all accounts. We enjoyed an afternoon of food and festivity with Mike's familia, including his absolutely adorable 90 year old Nana who continues to be the life of the party.


Here she is, pulling off leopard print better than anyone I know. And here is Mike, also trying leopard but not so successful.
November 24, 2010
Tiny Holidays: Perfectly Easy Dinner Rolls
If you are like us, you become a carb-glutton on Thanksgiving. The more carbs, the better. So in addition to stuffing, potatoes and everything else, I made homemade rosemary rolls at 10pm this evening. Insane? I think so. Delicious? I also think so. Here is the recipe- they are easy enough to whip up tomorrow morning, if you so desire.


Tiny Holidays: Easy Cranberry Sauce
This recipe is super quick and super simple. If you have time, refrigerate overnight. It lets the berries gel a little more and we like to serve it cold at the Thanksgiving meal, anyway. Enjoy!!
Cranberry Sauce

Cranberry Sauce

Tiny Holidays: PW's Pecan Pie
This is my first pecan pie, and I must say that it seems...terrifying bad for you. Which obviously means that it tastes fantastic. This recipe comes from the Pioneer Woman, who is an evil genius. Evil, evil, evil. But still a genius. I'm not quite sure this pie is going to make it till the morning. If not, don't tell my family- okay? You can check out PW's recipe here.


November 23, 2010
Quickie Dinners: The Perfect Fall/Winter Salad
This salad is ridiculous. It's literally the most perfect combination of flavors I could ever think of. Creamy, salty, sweet, crunchy, tangy. It has it all.
Every year, I yearn for some salad on the Thanksgiving table, and this salad will do the trick. I'm sure that it would be great to bring to a potluck (dress at the last minute) and it works as an awesome fall dinner on it's own.
 (I think we need a bigger boat...er...pan).
Every year, I yearn for some salad on the Thanksgiving table, and this salad will do the trick. I'm sure that it would be great to bring to a potluck (dress at the last minute) and it works as an awesome fall dinner on it's own.
 (I think we need a bigger boat...er...pan).
Subscribe to:
Posts (Atom)
You Might Also Like:
